KC Unplugged (sorta): 2012 in review, plus the Witch of the Epiphany (La Befana)

New tree at the Days this year, awaiting angel-topping and gifts below.

New tree at the Days this year, awaiting angel-topping and gifts below.

I imagine readers have figured out that the holidays took over my life, timewise, which resulted in no blogposts since a couple about our Thanksgiving feast weeks ago. More to come, but possibily not for a few days. (Here’s a tease: I’m hoping daughter Kristen will do a blogpost, or at least provide the recipe, for the awesome peppermint cheesecake she baked this year for Christmas Eve lunch.)

Tomorrow, the Feast of the Epiphany, brings a few more family members to our house and I’ll be prepping for that. I am, however, somewhat copping out on this one: so tired of cooking, baking, making-everything-nice that I’ve scheduled the gathering as mid-afternoon, snacks-only. And many of those will be from-the-freezer-case items or straight from grocery aisles I usually don’t bother much with in recent years. There will also be cheese and crackers. Probably hummus, salsa and nachos as well.

Christmas 2011 at George's: Bill, Marilyn (me), George, Heidi.

Christmas 2011 at George’s: Bill, Marilyn (me), George, Heidi.

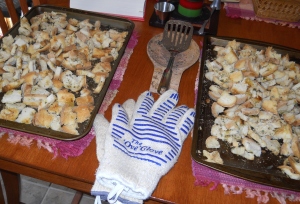
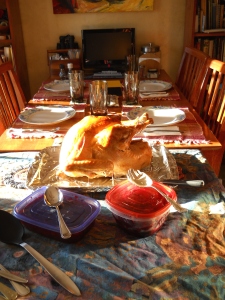
Brother George and wife Heidi are expected. Niece Chrissy (Heidi’s daughter) and her husband Chad, plus the four kids from their household are also coming. We didn’t get to see them on Christmas as all of us were heading in different directions this year. Nephew Matt (George’s son) and wife Kate, with their two young’uns Alex and Ella, won’t be joining us tomorrow but that’s fine – we did Christmas Eve lunch at their home (and a fine meal that was- mostly prepared by Matt) and exchanged gifts that afternoon. I made some homemade focaccia for that meal (a first for me), and Kristen’s cheesecake was a wonderful and ultra-filling dessert to close it out. We missed George and Heidi that day, however, as they arrived just minutes after we’d departed for home! 

Kristen's peppermint cheesecake, Xmas Eve lunch at Matt & Kate's (photo by Kate).

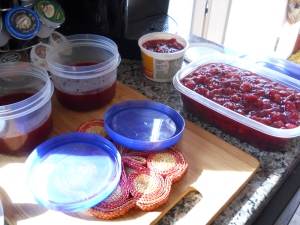
Kristen’s peppermint cheesecake, Xmas Eve lunch at Matt & Kate’s (photo by Kate).

Xmas Day 2011 at George's: Chrissy, Chad & kids.

Xmas Day 2011 at George’s: Chrissy, Chad & kids.

I’m looking forward to tomorrow’s batch of kids – I have become, per my brother, “the aunt who gives books.” Each child gets two of them this year along with an inexpensive toy (went a little overboard). I probably have more fun selecting those volumes than the kids do opening them!

If I had any energy left, I’d be baking some kind of cookies honoring Italy’s “Christmas Witch” or, to be more accurate, La Befana, the Witch of the Epiphany. Two or three years ago, when I was writing “goddess journal entries” about goddess-as-archetype and sharing them with a few friends, I somehow came upon La Befana. That discovery resulted in my creating an extensive e-journal entry about her. At the beginning of each entry, I always included an original poem about the entry’s g-archetype. Here’s my humble poetic creation about Italy’s famous holiday witch:

Sonnet for Befana, Witch of the Epiphany

Shadow sweeps across frozen yellow moon,
ragged cloak trailing soot of workworn days.
Befana, mounted, rides astride straw broom,
sharp-eyed despite the chilling winter haze.
She stills a howling wind, clears ice, melts snow –
while packing a bag more joy-filled than tears.
Most wishes She grants, detests the word No;
Stockings well-filled, she smiles, then disappears.
Santa’s got nothin’ o’er this wild old hag,
not loud ho-hos nor reindeer attractions,
for witches own magic – a well-known fact!
Sure work might delay her, too long a lag?
Adjustments she’ll make for odd distractions
so long as by morn She’s emptied that sack.

                                                 by Marilyn Zembo Day

Here’s the beginning of my 2011 La Befana e-entry:

She is folklore and She is goddess. She is Christian and She is Pagan. She can scare you – if you judge only by physical attributes – and yet you might await Her arrival on the edge of a child‘s excited anticipation. The ugly, soot-sodden hag Befana is the woman who won‘t disappear from Italian traditions, having survived the fall of the Roman Empire, the witch hunting crazes of the Catholic Church, devastating wars and deprivations, and some of the worst of patriarchal times. Just when you think the Yule holidays are done-for, She makes Her appearance, a smiling, female Santa Claus of ancient and modern times.

What?!!, you might say, Santa Claus? Witches are for Halloween, not Christmas time! And you’d be right… and wrong. Witches are among us always. We are all witches. We are all magick.

Google La Befana and Italy to see what you come up with, but I must tell you that I particularly love this video of DisneyWorld’s Epcot La Befana performance. Such fun! Check out the Witch of the Epiphany! She turned down the chance to travel with the Wise Men to honor the newborn Christ Child because she was busy “sweeping out the old, in the new” with her broom, before the coming Solstice/New Year. Then she tried to find the Child herself, bearing gifts. Unsuccessful, she vowed to bring gifts to all children she could find, until she came upon the Saviour. She does this every year on the eve of the Epiphany.

Today, the only “feast” shared on KitchenCauldron is this WildWoman of the Feast of the Epiphany… and statistics about the “feast” I’ve provided for you over the last 12 months, comprised of a smidgen of recipes I’ve prepared this year, served to friends and family, and photographed for this blog. WordPress provides its bloggers with the past year’s statistics in a report about their blog, and I’m offering them here for you to peruse (see below).

Thank you, all, for checking out KC (over 5700 hits!). I hope you’ve enjoyed my family and other stories, as well as the many recipes and food-related book and event entries. Hopefully, you’ve tried making a few of the dishes and baked goods (perhaps with your own creative twists and touches) and you’ve shared them in a comfortable space with your own circles of loved ones. It gives me pleasure to imagine such a scene.

Here’s to a healthy, happy, prosperous 2013 for all of us… with more recipes, stories and sharing throughout!

May the New Year be full of light and love for you and your loved ones. (Artist Trading Card #55, "Candle Comfort" by MariLyn)

May the New Year be full of light and love for you and your loved ones. (Artist Trading Card #55, “Candle Comfort” by MariLyn)

*****

Here’s what the WordPress.com stats helper monkeys prepared, as a 2012 annual report, for this blog:

Here’s an excerpt:

600 people reached the top of Mt. Everest in 2012. This blog got about 5,700 views in 2012. If every person who reached the top of Mt. Everest viewed this blog, it would have taken 10 years to get that many views.

Click here to see the complete report.

TOLD TO “STUFF IT”? IT’S EITHER THANKSGIVING, OR YOU’RE TALKING TOO MUCH – BETTER TO STUFF YOUR MOUTH WITH THIS STUFFING!

tksday 11-12_073Let me first confess that this year’s stuffing was not my best rendition. I was so thrilled that I had homemade turkey stock to add to the mixture, frozen a few months ago for just this occasion, that I overdid the moisture part. Or maybe the moisture just didn’t absorb as well as usual into the bread/croutons because, for the first time ever, I didn’t dig into the bowl with my hands and mush all the ingredients together, as I’d been taught to do by my mother. Apparently I was led astray by those gorgeous photographs of stuffing spilling out of the turkey’s cavity, with obvious chunks of bread, aromatics and sausage on display.

Well, our family likes most of those ingredients well-combined. Besides, not “mushing” can also result in a too-dry stuffing!

The recipe for stuffing in this blogpost is adjusted so that readers can make their own judgments on how much liquid to add to their stuffing, based on what I used and what I’d suggest starting out with. Our stuffing wasn’t waterlogged but could’ve done well with perhaps half-a-cup less of stock. It tasted great, however, and it was even better a couple days later as part of the topping (along with some of the potato casserole) on a Turkey Shepherd’s Pie.

As mentioned in yesterday’s entry, I opted for stuffing in the turkey rather than just filling its cavity with lemon and herbs and making it totally a side dish, baked separately. There’s never too much stuffing.

ckbook PolishOnly one family memory regarding stuffing and then on to the recipe. My father often got involved in the cooking on Thanksgiving, at least in Big Bird part, and he would sometimes mix together what he called “a Polish stuffing,” which translated to how his mother made it. Nana Zembo (who arrived in this country from Poland early in the 20th century) made a version that included raisins. I was never certain this was a true Polish food tradition until I perused my copy of Polish Cookery: The Universal Cook Book by Marja Ochorowicz-Monatowa (Crown Publishers; my copy is its 13th printing, 1975). It contains two raisin stuffing recipes, one in the “Poultry and Poultry Stuffings” section and the other under “Stuffings for Roast Pig.” I didn’t own this book, however, when I tried making a rendition of Nana’s dish. All I did was add raisins to my usual recipe (and maybe some diced apples or applesauce). Tasted glorious to me, but I found I was also the only one eating it. Our traditional TurkeyDay dressing disappeared into well-filled bellies but I guess “honoring our Polish heritage” only goes so far.

With that said, here’s the Day-Zembo family’s “usual” turkey stuffing. I create the same recipe for chicken, only with chicken stock (in fact, in past years it’s often been chicken stock that went into the turkey stuffing).

tksday 11-12_078

DAY-ZEMBO FAMILY TURKEY STUFFING
Yield: Enough to fill cavity of a 17-18 lb. turkey, plus a large ovenproof bowl/pan

Ingredients

  • 5 to 6 generous cups homemade (or supermarket purchased), herbed croutons – more if needed
  • Up to 1 quart turkey broth (you’ll start with less & eyeball it for moisture)
  • 1 tablespoon oil (more if needed, as sometimes is the case with turkey sausage)
  • 10 to 12 ounces turkey (or pork) sausage
  • 1 to 2 tablespoons butter
  • 3 medium to large onions, peeled and chopped
  • 1 medium carrot, peeled and diced small (Mom never added carrots; it’s my way of sneaking some extra nutrition into the mix.)
  • 3 large celery stalks, peeled and chopped
  • 3 garlic cloves, peeled and finely chopped
  • salt and pepper, to taste (minimum, however, of a teaspoon of salt and ½ teaspoon of pepper)
  • 1 teaspoon dried thyme
  • 1 tablespoon dried sage
  • 1 tablespoon dried parsley
  • a couple tablespoons Bell’s Seasoning, if desired
  • 2 large eggs, lightly beaten (optional but advisable; I didn’t include them this time— had I done so, perhaps they would have offset the extra moisture since eggs work as binders)
  • additional butter to dot dish of extra stuffing

Process

  1. Into a very large bowl, pour the croutons.
  2. Heat oil in a large skillet and add sausage. Sauté until browned, using spatula as it cooks, to break into small bits. (I had to use turkey sausage – daughter doesn’t eat pork or red meat – and couldn’t find a package of it with “breakfast sausage” seasonings in it, so wound up with a 9.6 oz. package of Jimmy Dean Hearty Sausage Crumbles.) If sausage is the pre-cooked kind, still sauté to warm it and to add flavor to the pan.
  3. Remove sausage to a paper-towel-covered plate to drain.
  4. Add butter to skillet and, when melted, further add onions, carrots and celery, cooking for about three minutes. Sprinkle with salt and pepper.
  5. Add garlic to pan and sauté for an additional minute, monitoring mixture to be sure garlic doesn’t burn.
  6. Return sausage to pan and add about a cup of the stock. Use spatula to scrape any pan brownings up, further flavoring the broth mix. (This is called deglazing.)
  7. After a few minutes, turn heat off and add contents of pan to the bowl of croutons, mixing together well.
  8. Add one cup of warm stock (I microwave it) to mixture, plus the thyme, sage, parsley and Bell’s Seasoning (if using). Also add any additional salt and/or pepper, as desired.
  9. Ensuring first that the mixture is cool enough not to “cook” the eggs upon addition, add eggs to the mix and stir until combined.
  10. Then DIG IN with those hands, mushing the mix together. You aren’t going to make it into one gooey mess, breaking down veggies into nothingness, but croutons should be well-dampened with some of them broken down entirely. (If it’s a bit dry, add more stock— a little at a time to avoid overdoing it. Too wet? No harm in adding more croutons. Judgment call.)
  11. If roasting stuffing inside the bird, as well as in a separate dish, make sure turkey’s cavity is salted and then fill about ⅔ to ½ full (stuffing expands). I don’t bother to try to sew up the cavity; I simply pull drumsticks together and tie with kitchen twine. (See yesterday’s post for suggestions about roasting the bird.)
  12. Fill an appropriate-sized, ovenproof dish or pan with remaining stuffing. Dot with butter.
  13. Extra stuffing can be baked along with the turkey (but only for about 30 to 45 minutes of the turkey’s time, so schedule accordingly), or separately. Since we have only one oven in our kitchen and the bird takes up most of that space, I usually microwave stuffing until heated through and then place it in the oven after turkey has been removed and is resting on the counter. Bake it until browned on top and thoroughly heated through.

There you have it – my guidelines for great stuffing. It takes practice in judging exactly how much stock you’ll want in your own version. And still, after years of T-Days (or whenever you’re indulging in turkey), you might not come off with exactly the texture you were aiming for. Hopefully, however, it’ll still be full of flavor, as ours was – and it’ll work well in those recipes for leftovers!

IT AIN’T ALL ABOUT THE BIRD – STUFFING CAN MAKE OR BREAK THE T-DAY MEAL (BUT IT ALL STARTS WITH THE BIRD… and the bread!)

tksday 11-12_068

On the other hand, there are so many considerations about that bird and the stuffing to go with it, before we even get to the roasting/eating part:

  • How big a bird? (Definitely want leftovers. Ours was a 17+ pounder.)
  • What else about the bird? (Bought a “natural, fresh” turkey this year. Generally winds up juicier.)
  • To brine or not to brine? (Never tried it, wasn’t about to this time.)
  • If not brining, how to ensure it’s nice and moist? (I loosened the skin and injected homemade turkey broth.)
  • What about flavoring for the skin? (Basting with melted butter can’t be beat; sprinkled with pepper and a few herbs such as dried parsley, marjoram, thyme and/or rosemary.)
  • What to do with all the “stuff” that’s inside? (Take the “stuff” – gizzards, heart, etc, out of the bird, put in saucepan, add water to cover, sprinkle with salt and pepper, bring to boil, then simmer until liquid is reduced by ⅓ to ½. Discard “stuff” and put aside liquid for later gravy-making.)
  • How about the inside of the turkey? (Always rub with salt. Further, I considered two options: either cut a lemon in half and pull some frozen “fresh” rosemary out of the freezer, then stash it in the bird’s cavity; OR fill it with stuffing. I went with option #2.)
  • How long do I cook it and at what temp? (I always look to see if it gives hourly rates on the fowl’s packaging. If not, I check one of my many cookbooks or go online. I never seem to retain this kind of info in my brain, or maybe I just worry too much about screwing it up! I do recall that 325 degrees Fahrenheit is the best temp. Still, I try to buy a bird with one of those pop-up gadgets that tells you it’s done, and then I’ll use a meat thermometer to check doneness anyway!)
  • How to get it properly done without burning the skin? (I cover with aluminum foil until about the last hour in the oven. Then I remove the foil and baste a few times during next hour to ensure nice browning.)

Those are my Basics About the Bird. Not a recipe, just a guideline. Because this post is really about the stuffing. No, it’s about the prelude to the stuffing: the croutons that make up its bulk.

Prep for the stuffing began the day before Thanksgiving, with concocting homemade croutons (not all of these would go into the stuffing either—some were ground into bread crumbs for sprinkling atop potato casserole). I was determined that, this year, I would not buy a single bag of those pre-made croutons found in the supermarket. Their listing of ingredients includes whatever additives the manufacturer deems necessary to make sure the little dried-out bread bits stay dry, don’t mold, manage to last from factory to store to your house – which probably means that, even if not bk food rulesdeemed toxic by the government, there are still ingredients in that bag that your (or my) grandmother would not recognize as food. (Rule #2 in Michael Pollen’s Food Rules: An Eater’s Manual [Penguin Press, 2009, 2011]: “Don’t Eat Anything Your Great Grandmother Wouldn’t Recognize as Food.” I happen to be old enough that I can eliminate the “Great” since my Grandmothers were born in the late 1800s! Also note that Pollen’s Rule #3 is, “Avoid Food Products That No Ordinary Human Would Keep in the Pantry,” which means all of those ingredients on labels that I can’t pronounce, let alone remember…).

I started with a good loaf of Italian bread from Bella Napoli Bakery and I used excellent dried spices, many of which I purchase at the Schenectady Green Market. There’s a great vendor there, March through mid-December (they head south for the winter) called Wellington’s Herbs & Spices, out of Schoharie County. In fact, I’m super-glad I made it to the Green Market today – needed more dried parsley (I use a ton of it) – because I learned that next week is their last SGM Sunday until March. This means I will do my best to get back there next weekend, after assessing my stock of dried herbs, to be sure I have an adequate supply for several months!

tksday 11-12_031

tksday 11-12_030

But I digress… back to the croutons. And a little kitchen magic.

ckbk kitwitch companionIf you’ve been checking out KitchenCauldron for a while, you know I sometimes like to throw in a bit about the “magical associations” of food, which often can be connected to what science has discovered about the healing (and sometimes detrimental) properties of food. I like that one of the tenets of Patricia Telesco’s “Kitchen Witch’s Credo,” as set forth in her book The Kitchen Witch Companion: Simple and Sublime Culinary Magic (Citadel Press, Kensington Publishing Corp., 2005) reads, “There is nothing on this earth that cannot be used for magic.” She also states, “Life is a ritual and act of worship,” and “Kitchen witchery always reflects your own principles.” I believe our “principles” are developing and re-developing over our entire lifetime. A couple of decades ago I might have thought creating croutons in my own kitchen was cool but Pollen’s Rules #2 or #3 wouldn’t have come into the picture. I am older, somewhat wiser and much more worried about the fate of this planet and its inhabitants than decades ago.

As one of those earth-bound occupants, I find it soothing to know that bread is associated with kinship and sustenance (think “communion”); that parsley and garlic are endowed with protective energies (and parsley might also enhance one’s luck); that coriander denotes love, well-being and intelligence; that marjoram’s magical properties are said to include peace and love. It’s interesting to me that the sage sprinkled over my croutons speaks of wisdom and ckbook witch in kitchredemption, and that its thyme could aid in banishing nightmares. Cait Johnson, in Witch in the Kitchen: Magical Cooking for All Seasons (Destiny Books, 2001), writes, “Our culture considers cooking a chore; we are encouraged to get it over with as quickly as possible. But it may help us to remember that cooking was once a magical act. Cooks were priestesses who wielded the power of fire, transforming raw ingredients into nourishment for themselves and their families. The act of cooking linked women with the Goddess, the Great Nurturer.” In a fundamental way, women (and men too) are empowered through their ability to cook/bake. This is true alchemy.

So think of this as a simple bit of alchemy, transforming bread into gourmet-like croutons – which can make stuffing scrumptious, enhance favorite soups and be further transmuted into tasty bread crumbs to top all sorts of dishes.

tksday 11-12_035

EASY-TO-MAKE, (Maybe) MAGICAL CROUTONS
Yields two large cookie sheets full of croutons (maybe 5-6 cups?)

Ingredients

  • One large loaf Italian bread, sliced into cubes about ½’ to ¾” square
  • 5-6 tablespoons olive oil
  • 1 tablespoon dried thyme
  • 1 tablespoon dried marjoram
  • 1 teaspoon coriander seed
  • 2 tablespoons dried parsley
  • 1 tablespoon garlic granules
  • ½ teaspoon dried basil
  • 2 tablespoons dried sage

Process

  1. Pre-heat the oven to 375 degrees Fahrenheit.
  2. Grease two large cookie sheets with one tablespoon of olive oil each.
  3. Spread the bread cubes out over both sheets, trying not to overlap any.
  4. Combine thyme, marjoram, coriander, parsley, garlic granules, basil and sage in a bowl and mix together welltksday 11-12_032
  5. Sprinkle the dried herb mixture over all the croutons.
  6. Sprinkle the remaining olive oil over the herb-sprinkled bread cubes.
  7. Bake in oven until turning golden-crunchy, using a spatula to turn cubes over after about 10 minutes (don’t panic if you can’t get all of them turned – it will work out just fine!). Toasting should take from 20 to 25 minutes, but start checking earlier and keep an eye on their progress. Ovens vary, temperature-wise.
  8. Remove from oven and allow to cool completely.
  9. Store in a plastic bag until using the next day in stuffing or other recipe. Or store for up to a week. (To make bread crumbs, just toss into food processor and process for a minute or two until they reach desired consistency.)

tksday crouton 11-12_036

Next blog entry: the stuffing!

WELCOMING THE SEASON WITH SWEET, TANGY CRANBERRY-ORANGE SAUCE – ONE OF MY FAVS ON THE THANKSGIVING MENU

tksday 11-12_080I’d planned to blog about Thanksgiving dinner over a week ago, just after the Chili Bake recipes, but it was not to be. I’ve been through the wringer with a tooth infection under a bridge installed by my dentist back in 1988, an experience I’d prefer never to happen again. Suffice to say that I’ve lost one of the two teeth under that bridge and have not been in writing or eating mode most of the time since (hey- I lost about 6 pounds as a result- a little leverage for holiday snacking might be the only benefit to the whole mess!). To get back into the spirit, however, I decided this morning that providing readers with one of the simplest, sweetest and most favored (at least by me) of over a dozen(!) dishes served on Turkey Day would be a good start. More recipes will follow in future blogposts.

This year, unlike most, we decided to do dinner at home with just the four of us – Bill and me with adult offspring Kristen and Adrian. Most often in recent years, we’ve gone to brother George’s (his wife is Heidi), since they have a much larger home. They had other plans anyway, and we were happy to anticipate the best part of Thanksgiving: leftovers over the next few days. We were also invited to the home of one of Adrian’s friends for dessert, and I baked an awesome and new-to-me cake to contribute to that feast.

Memories of Thanksgivings past, of course, kept bubbling up as I stirred the cranberry sauce the day before the big meal, as well as throughout the holiday. Don’t we all have those tidbits of family and friends in the back of our minds as each holiday arrives?

When we were kids, we were part of a huge family gathering. Our mother was one of eight siblings and Grandma Boyd liked to get as many of them together as possible. I have vague memories of the cousins running amok in her and Grandpa’s small basement apartment on Hamilton Street in Albany and, in other years, between the two flats on the third floor on Central Avenue where Aunt Pat and Uncle Doug lived at #61 Central and we were at #63 (same building, across the hall from each other). In our place, the living room and dining room were what they’re calling today “open concept” and that’s where tables were put together for the feast. The meal included turkey, stuffing (always a sausage version, sometimes an oyster one too), gravy, mashed potatoes, and what we called turnips (but they were really rutabaga). There’d be other vegetables, most likely corn and/or peas or green beans, and creamed cauliflower (not really “creamed,” more like “in cream sauce”). I vaguely recall sweet potatoes making an occasional appearance but, at the time, you wouldn’t get me to touch them! And the pies: pumpkin, apple and George’s favorite, mincemeat.

In addition to the turkey, unlike most households on that day, another “meat” such as roast beef or lamb, always graced that table because our grandmother wouldn’t eat turkey! She always said that she’d grown up on a farm and saw what those “dirty birds” ate off the ground. She just couldn’t stomach it!

Another memory, probably after Gramma had passed away: Mom and Aunt Pat in our kitchen, trying to get the gravy to come together just right. I think Gramma was the gravy diva on Turkey Days past and, while they had certainly made gravies themselves before, this time it just wasn’t working. It would be too thin, so they’d add a slurry of water (or milk?) and flour. Too thick, so more water. In the end, it tasted more like flour-water than gravy but it was hot atop the stuffing and turkey, and not so bad with buttered potatoes.

In 1971, the Northeast got hit with one of the biggest Thanksgiving snowstorms in its history. My dad was in the Veterans Administration hospital, having had a stroke several weeks before (his final one, which would take him from us eventually, on Christmas Eve that year), and the plan was that we (Mom, brother Bill and I) would visit him and then go to Aunt Pat’s and Uncle Doug’s house for dinner. Several years before, they’d moved to a more spacious apartment on Elk Street, about six blocks from Mom and Dad’s. George was now married, and he and Sharon lived in Selkirk, south of Albany. I no longer lived at home but was spending the night with Mom and 13-year-old brother Bill. As the expression goes, “The best-laid plans of…” – there was no way we could safely get to the VA Hospital that day. We didn’t own a car, and taxi cabs either weren’t running or were running hours late. We called the desk on his floor and asked a nurse to let Dad know we couldn’t make it, and then decided we’d set out amidst the drifting snow, trudging up Central toward our dinner.

We were almost ready to turn back in less than 10 minutes when, lo and behold, one of the few cars driving up Central (in those days, usually a busy thoroughfare in the city, a shopping area in fact) stopped and the driver waved at us. It was Uncle Arch! Crazy, lovable Uncle Arch was out driving in that mess! I have no idea why he was buzzing through what would wind up being 22.5 inches of the white stuff (30 inches in some areas), but, as the three of us piled into the car, we were grateful he showed up! George and Sharon arrived at Aunt Pat’s a little while later, having decided to risk snow-filled roads because all they had to eat in the house was the pie they were contributing to the table fare! We didn’t stay late because of the storm, but it was probably one of the most appreciated Thanksgiving repasts we’d ever consumed!

tksday 11-12_067

There are other memories but it’s time to get on to this year, or I’ll be writing all day before the recipe gets posted. So here’s the menu, from a day whose weather was clear, bright, and above the average temperature (in the low 50s!):

Roast Turkey
Stuffing with turkey sausage, made with homemade croutons
Gravy (a little thin, but I wasn’t risking the flour-water possibility!) 
Mashed Potato Casserole
Buttery Rutabaga
Cauliflower in Cheesey Cream Sauce
Broth-and-butter-braised Carrots
From-Scratch Green Bean Casserole
Sweet ‘n’ Sour Beets
Buttered Peas and Carrots
Cranberry-Orange Sauce
Magic Chocolate Flan Cake (brought to Frank & Robin’s house for dessert)
Thanksgiving CakePops (Turkeys & Snowmen, made by Kristen, also brought to Frank’s)

Growing up, the only cranberry sauce I tasted was the “jellied” kind bought in a can at the local supermarket. Always Ocean Spray brand (store brands were less prevalent in those days). I was married several years before discovering there was something called whole-berry sauce, and I loved it. Imagine my delight when I first made it from scratch, rather than the canned version first ingested. As usual, I consulted several cookbooks and then made it my way (sounds like Frank Sinatra, doesn’t it, “I did it my way…”). Eventually, that recipe evolved into a cranberry-orange rendition. tksdy notes12_001I’m not sure I even create it the same way every time, but this Thanksgiving I was adamantly scribbling ingredients and other info on yellow sticky notes as I made the entire meal (two days of cooking and baking)—so I now have this basic game plan for the next time I make this awesome condiment. Plus notes for a few more posts on KitchenCauldron.

Getting a little witchy (this blog is a cauldron, you know), you might like to know that, according to Cunningham’s Encyclopedia of Wicca in the Kitchen (Llewellyn Publications), the “sourness of cranberries makes them an ideal protective food.” Cunningham notes that these berries are native to North America and Europe. He says, they were ckbk wicca kitchen“eaten by Indians long before being introduced to the Pilgrims.” I’m thinking it’s not just the sourness that would point to cranberries’ protective energy. There’s something about their deep red hue that speaks of strength to me. After all, aren’t red and orange foods supposed to be rich in nutrients? Food science tells us there’s the carotenoid called lycopene in the reds (especially good for prostate health) and oranges contain beta-carotene, which converts to vitamin A in the body (supporting the immune system, promoting bone growth, and regulating cell growth and division). Sure sounds protective to me.

So let’s get on to a recipe for good health, albeit one of many one might indulge in on an over-indulgent holiday. (This is also especially great when prepared the day before – convenient, so lower stress, ergo better for you too!)

tksday 11-12_042

SWEET ‘N’ TANGY CRANBERRY-ORANGE SAUCE
Yields a couple cups (with extra juice to freeze for later use!)

Ingredients

  • 24 oz. bag cranberries (fresh or frozen)
  • 1½ cups sugar (have a bit more available, in case needed)
  • zest of 2 oranges
  • ¼ teaspoon ground cardamom
  • 1 teaspoon Roasted Saigon Cinnamon (or regular cinnamon)
  • up to ¼ teaspoon ground nutmeg (or less, if preferred, & I prefer fresh-ground nutmeg)
  • 1/8 teaspoon ground cloves
  • juice of ½ orange (or substitute juice from small can of mandarin oranges)
  • juice of ½ lemon
  • 2 oranges, peeled, each section cut into 2 or 3 pieces (or use equivalent in canned mandarin oranges)

Process

  1. In a medium-sized sauce pan, bring cranberries and all other ingredients except for orange sections to a boil.tksday 11-12_048
  2. Reduce heat and simmer until all berries seem to have popped and sauce begins to thicken a bit.
  3. Add orange sections and let simmer another couple minutes.tksday 11-12_045
  4. Taste for desired sweetness. Stir in extra sugar, if desired.
  5. If the sauce doesn’t thicken to your preference, you can choose to use a slurry of the juice and a bit of corn starch to aid the process, but it’s just as good without being too dense. (I froze extra juice, with a plan to use it in a future pork tenderloin recipe, as yet to be concocted.)
Sauce for The Day, a portion for daughter to take home & juice for a future roast!

Sauce for The Day, a portion for daughter to take home & juice for a future roast!

CHOCOLATE DOESN’T BELONG IN MUFFINS? TRY THESE BANANA CHOCO/CHIP DELIGHTS!

That would be me—the lady who says that chocolate has no business floating around in muffins (which I have mostly considered to be breakfast or coffee-break/teatime fare). If you’re a Baby Boomer like me, you might recall the old Bill Cosby routine wherein Cosby is making breakfast for his kids and they want chocolate cake, so that’s what he’s gonna give ’em! Our son Adrian loved that skit (might even have heard it live at the Proctor’s when we took him to see the comedian perform – can’t recall which routines included in the act!), What made it funny was the fact that, two or three decades ago, no one considered chocolate as appropriate on any kind of early morning menu. Who but a father who was not used to pulling together a real meal would even consider dishing it out to his kids? I tend to think chocolate started to sneak into the rise ‘n’ shine food group with the intro by Dunkin’ Donuts’ of their Boston Cream filled donuts. Even I wasn’t immune to those…

But getting back to my kitchen, where three bananas dangled from the “banana hook” on my kitchen counter, already more ripe than I prefer unless mixed into something bake-worthy. And I wanted to make just one more thing to bring to that chili/bake sale at Kristen’s workplace. So I scanned the dessert/baking cookbook shelves and wound up pulling down the Moosewood Restaurant Book of Desserts by the Moosewood Collective (Clarkson Potter Publishers/Random House, 1997), probably because I have a special love for Moosewood, which I’ve written about on this blog. (I’m not the only Moosewood lover either. Check out a seven-page article, “40 Years of Moosewood!” by Jamie Stringfellow in the November/December 2012 issue of Spirituality & Health magazine, in which it is noted that Bon Appétit named the restaurant as “one of the 13 most influential restaurants of the 20th century.”)

In the long run, the muffins I created changed out or added something like six or seven new or slightly revised ingredients, so it’s not their recipe at all. It was the inspiration that I needed, however, and it worked. If you need a run-through of differences: butter instead of oil; added yogurt; split brown sugar between light and dark; reduced flour amount and added almond meal; added cinnamon; cut vanilla extract in half to add in almond extract; added mini-chocolate chips.

These were heavenly. Bill and I split one. One was packed into the thermal bag with Kristen’s chili & cornbread lunch & cookies (necessary because, otherwise, she is so busy with aspects of the sale/raffle, sometimes all the food is sold before she gets any lunch!). That left eight for the sale. Don’t know who bought them, but I’d be willing to bet they didn’t last long!

MARILYN’S BANANA CHOCO-CHIP MUFFINS
Yields 10 large Muffins

Ingredients

  • ½ cup butter, softened
  • 2½ tablespoons plain Greek yogurt (I used 2%)
  • 1 cup brown sugar (I used a combo of light & dark brown sugars)
  • 2 eggs
  • 3 large ripe bananas, mashed
  • 1½ cup unbleached all purpose flour
  • ¾ cup almond meal
  • 1 teaspoon Roasted Saigon cinnamon (plain ol’ cinnamon will work too)
  • 1 teaspoon baking powder
  • 1 teaspoon baking soda
  • ½ teaspoon salt (table salt or fine-ground sea salt)
  • 1 teaspoon pure vanilla extract
  • 1 teaspoon almond extract
  • ½ to ¾ cup mini semisweet chocolate chips

Process

  1. Preheat oven to 350 degrees Fahrenheit.
  2. Grease jumbo muffin tin or insert paper liners.
  3. In a large bowl, beat butter, yogurt, sugar, eggs and bananas until well blended.
  4. In a separate bowl, sift together flour, almond meal, cinnamon, baking powder, baking soda and salt. (If tiniest bit of almond meal doesn’t go through sifter – we’re talking something like no more than “a pinch” – it’s okay to turn sifter over and dump into bowl.)
  5. Fold dry ingredients into wet, using quick strokes and being careful not to overmix.
  6. Gently stir in extracts.
  7. Fold in chocolate chips.
  8. Spoon batter into prepared muffin tin.
  9. Bake for 25-30 minutes, or until cake tester or butter knife comes out clean when inserted into muffin.
  10. Turn muffins out of tin within first five minutes of removal from oven. Cool on a rack.

SWEET’NING UP THE CHILI – BUT NOT TOO MUCH: PUMPKIN/SWEET POTATO CHILI WITH BEANS & CHICKEN

At home, we ate our pumpkin chili with melted cheddar cheese atop!

It’s that time of year again- food, food, food. The holidays aren’t just about gifting and – for church, synagogue, mosque and temple goers – celebrating a holy event. They’re about gathering together of family and friends, enjoying each other’s company. And that means, “Feed ’em!” But this also entails remembering that not everyone lives in the best of circumstances, especially in these tough economic times. We may struggle to keep up with the bills and pay for transportation to work or the grocery store and other basics, but not everyone has a job to go to or even enough to eat. So it’s important to somehow “pay it forward” (as that movie so poignantly advised). Today’s recipe, in honor of all holidays from Thanksgiving through the end of December, is the chili recipe I created for daughter Kristen’s workplace chili & bake sale / raffle & silent auction – an event that raises money for charity.

Last year was the first year I contributed a large batch of chili for the sale, and this year I decided to bake as well. Cheesey Cornbread (with extra cheese) to go with the chili and Cardamon Risotto Cookies (a twist on my regular Risotto Cookies, with sugar-cinnamon also replacing the frosting). Then, at the last minute (several hours before we were to deliver food to the office), I decided to throw in some Banana Chocolate Chip Muffins (bananas too ripe for me to eat on cereal – I like ’em when there’s a little green left on the peel!). The muffin recipe will follow in another blog entry.

A busy, delicious two days (well, you didn’t think I was going to whip up all that good stuff and not indulge myself?!), and a lucky time too. After the sale was over, Kris called. I thought she was simply letting me know how much they’d brought in. This year’s proceeds are being split between the local food pantry and agencies providing aid to New York City and Long Island victims of Hurricane Sandy. After Kristen told me they’d raised well over $5,000 (eventual total was $5,700), I was about to hang up when she called out, “Wait! You won one of the raffle baskets!”

Not only did I win a raffle basket, it was The One I’d hoped to get, if I won anything at all (which I wasn’t expecting). The huge plastic container included a 19” television and a ROKU with 6-month subscription to Netflix. We already enjoy Netflix so that’s a nice credit on our account, but I was thrilled to acquire a small TV for my downstairs office/artroom (for when it is finally remodeled, which Bill promises will happen after Christmas, although other work on upstairs might take precedence). It won’t be anything fancy but homey enough for me! Oh yeah—the theme of the basket was “Holiday Movie Night” and the box was also packed with things like a warm (red) throw, peppermint cocoa mix, a Santa mug, a dark & white chocolate peppermint bark candy bar, and microwave popcorn. (The candy bar did not last long. I love peppermint bark.)

In addition to such good fortune, I was pleased to hear that all of my chili disappeared into the mouths of many of my daughter’s co-workers. Kris said there were plenty of positive remarks. Apparently, several of them are interested in seeing the recipe on Kitchen Cauldron when posted. One woman made a point of approaching Kristen afterward to say it was the best chili she’d ever tasted! I have to agree with that statement because I think it’s the best chili recipe I’ve ever conjured up. Bill and I enjoyed it immensely at dinner that night.

Here’s hoping you give it a try and really like it too. Don’t be put off by what looks like a long list of ingredients. Once the peeling and chopping is done, it’s mostly about getting the stuff into the pot and simmering. Really easy, as chili generally tends to be.

PUMPKIN/SWEET POTATO CHILI (WITH BEANS AND CHICKEN)
Yield: Depending upon quantity of beans & if including chicken, makes 8-10 quarts of chili

Ingredients

  • 2 large sweet potatoes, peeled and cubed
  • 1 tablespoon parsley
  • 2 tablespoons butter
  • 1 or 2 boneless, skinless chicken breasts, cut into ½” to ¾” pieces (optional, especially if you’re a vegetarian)
  • 1 tablespoon olive oil, plus 1 tablespoon butter
  • 4 medium-to-large onions, peeled and chopped (large or small pieces, whatever your taste)
  • 3 celery stalks, peeled and chopped (including leaves, if any on stalk)
  • 2 large carrots, peeled and chopped into small pieces
  • 6 peppers (I used 2 yellow and 4 green), seeded and chopped
  • salt & pepper to sprinkle over veggies
  • 4 or 5 garlic cloves, peeled and diced (I had roasted some, so I used the paste from those cloves)
  • 1 29-oz. can pumpkin purée (NOT pumpkin pie mix)
  • 2 14.5 oz. cans diced tomatoes
  • 1 15-oz. can tomato sauce
  • 4 cups vegetable stock, plus 4 cups chicken stock (or use any combo of these stocks, or just one type; homemade preferred by not required)
  • 3-4 tablespoons chili powder (more if you prefer)
  • 1 teaspoon ground cumin
  • ½ teaspoon red pepper flakes
  • 1 generous teaspoon ground cinnamon
  • ¼ teaspoon ground nutmeg
  • ¼ teaspoon mace (optional, but I would always use it; if you don’t have it, could increase nutmeg)
  • ¼ teaspoon ground clove
  • ¼ teaspoon ground cardamom (optional; I meant to add this & forgot!)
  • 2 tablespoons dried parsley
  • a few sprinkles dried marjoram (optional- not required if you don’t have on hand)
  • 1 to 2 teaspoons salt (I used combo of table salt and sea salt)
  • 1 to 2 teaspoons black pepper
  • 4 to 6 cans beans – I used dark red kidney, black, great northern, aduki and pink beans, as well as chickpeas
  • additional salt and pepper, if desired
  • possibility: more stock (or water) or some tomato paste, if a thinner or thicker chili is desired

Process

  1. Pre-heat oven to 400 degrees Farenheit. Place sweet potatoes in an oven-friendly dish or pan, dab with the butter and sprinkle with dried parsley. Bake until fork slips through chunks but they aren’t likely to disintegrate after additional cooking in chili sauce. I use a spatula to turn once in a while. (I also cover with aluminum foil for first 15 minutes or so, then remove so they get a bit browned.) This should take perhaps 30-40 minutes but begin checking earlier. Remove from oven and set aside until ready to add to chili. NOTE: this can be done the day before, if you like.
  2. In a large stock pot, heat the oil plus butter on medium level. Add chicken and sautée just to lightly brown (don’t worry if completely cooked through). (About 4-5 minutes.)
  3. Add onion, celery, carrot and peppers. Spinkle lightly with salt and pepper. Sautée for about 2-3 minutes.
  4. Add garlic to pot, sautéing for another minute (be careful – garlic easily burns).
  5. Stir in pumpkin purée, tomatoes and tomato sauce, combining well.
  6. Stir in chicken and/or vegetable stock.
  7. Add chili powder, cumin, red pepper flakes, cinnamon, nutmeg, mace (if using), clove, cardamom (if using), parsley, marjoram (if using), salt and pepper.
  8. Simmer over medium-low heat for about an hour.
  9. In the meantime, drain and rinse the canned beans.
  10. After the contents of the stock pot has simmered for the suggested time, stir beans into chili. Bring back to a simmer and continue to cook for another 20 to 30 minutes.
  11. Add roasted sweet potatoes. Simmer for another 20 to 30 minutes.
  12. Taste for seasoning. Add salt and/or pepper, if desired.

Serve with cornbread on the side or some excellent artisan bread. Nice with shredded cheddar cheese atop, or a dab of sour cream.

In my experience, chili tastes even better as a leftover. Like any tomato-based dish, the flavor deepens as it sits in the fridge. It also freezes really well. Make some for a crowd, and reserve some for you and yours too!

Super Sweet Blogger Award

KitchenCauldron was recently nominated for “The Super Sweet Blogging Award” – which obviously doesn’t mean the nominee ONLY blogs about sweet things, offering sugar-filled recipes in every post. What it entails, it seems to me, is that some of the blogger’s recipes include yummy desserts – but there’s also a “sweetness” in the fact that one gets nominated by another blogger who has read and been inspired by your postings – recipes and ramblings alike. This sister or brother blogger thinks your link is worthy of sharing with others. In turn, accepting the nomination, I get to pay it forward – I direct my readers to the wonderful blog of the person who nominated me, and I list some blog sites that have inspired me.

I would like to thank Baby Boomer Bakes blog for giving KitchenCauldron this wonderful Super Sweet Blogging Award. I discovered Nikki Norman’s fabulous blog a short time ago and love it! Nikki’s a Florida food and travel blogger, plus an award-winning recipe developer, food stylist, and food photographer.

Rules for this award include:
1. Thank the Super Sweet blogger who made the nomination.
2. Answer the five questions provided with award.
3. Nominate a baker’s dozen of other bloggers.

Here are the answers to the sweet questions posed to me:
1. Cookie or cake? CUPcakes! Love idea of individual little cakes, just enough sweetness in one serving. Almond cupcakes are my latest fav (see recipe on KitchenCauldron).
2. Chocolate or Vanilla? Vanilla, although a super-good chocolate is hard to resist.
3. What is your favorite sweet treat? Hard to say, but I do love Jelly Belly Jelly Beans! And then there’s pumpkin pudding.
4. When do you crave sweet things the most? Right after dinner.
5. If you had a sweet nickname, what would it be? Already called Honey by hubby but, if guided by my favorite spice, it would be Cinnamon.

It is always a challenge to single out specific blogs, as there are so many great ones available. However, below are some of the sweet people I’ve nominated:

http://www.savorysimple.net/

http://mamasgottabake.wordpress.com/

http://mollysmadeleine.blogspot.com/

http://www.thebakingbeauties.com/

http://frugalfeeding.com/

http://www.eatingfromthegroundup.com/

http://chocolateandzucchini.com/

http://glutenfreegirl.com/

http://thebigfatnoodle.com/

http://smittenkitchen.com/

http://crockpot365.blogspot.com/

http://noteatingoutinny.com/

http://emmycooks.com/

EASY, CHEESEY (IN THE BEST WAY) CORNBREAD

When I decided to serve cornbread with the Lentil Soup (see previous post), I’d forgotten that a recipe for it had been included in The Homemade Pantry, the book From Scratch Club was reading and cooking/baking its way through. Didn’t even look in the book before clamoring through my cabinets to see if I had cornmeal. And I didn’t feel like putzing through a bunch of cookbooks to find a recipe I could either make “as is,” or play around with to my own taste. It isn’t that I’ve never made the stuff before, just that previous cornbread has either been from a boxed mix or the recipe I made it from didn’t thrill me enough to get it written down.

It turned out there were two cornmeal possibilities amidst my baking goods: ol’ reliable Quaker yellow cornmeal and a more authentic-looking stone-ground type with a Native American profile on the front of the package (reminiscent of the fact that the only time I ever heard of cornbread as a child and throughout teen years was when certain Indian tribes were discussed during history lessons, usually around Thanksgiving!). Since the Quaker package sported an upcoming expiration date in December 2012, my more frugal persona took over (maybe that’s the other kind of cheesey surfacing, as in the cheapest, but not always the most delicious, way ). I wasn’t about to toss out still-good ingredients, even if the alternative was probably “better for you,” maybe tastier and perhaps the result of more organic farming methods. Didn’t want to know all that. Just wanted to get on with baking.

Of course, perhaps I should feel guilty for… for not feeling guilty about using the “better” cornmeal. After all, modern technology has taken what was/is a sacred food for many of the world’s inhabitants (and former inhabitants) and bastardized it into chemically-enhanced products solely to give it longer shelf-life and thus allow industry to make larger profits. “Longer shelf life” does not equal “more nutritious” and sometimes it does equal “not-so-good-for-you.” Whole civilizations once built their spiritualities around goddesses worshipped because human beings believed these other-worldly beings somehow controlled crops, shepherding in a rich harvest that could nourish their families through the long, hard winter (or conversely causing drought, disease and other disasters which invited starvation and death).

Corn Mother is a big deal in the Americas to Native Americans. She’s found in various forms in indigenous faiths throughout the two continents. Cunningham’s Encyclopedia of Wicca in the Kitchen (Llewellyn Publications, 2003) tells us, “The Quiche Mayas of Guatemala and the Navajo believed that the first humans were created from corn. The Mayas, Incans, Aztecs, and nearly every American Indian tribe ate corn and incorporated it into their religious beliefs and rituals. The corn mother was perhaps the most widely worshipped deity in the pre-Colmbian Americas. As a symbol of life, fertility, eternity, and resurrection, corn was a sacred gift of the Mother Goddess.” Corn was one of the Americas’ gifts to the world. It may not be called sacred by the millions it feeds today, but it sure can help to fill a growling belly.

Cunningham notes that many people still view corn as sacred and believe that  to waste it is to cause poverty. He compares it to the way Asians feel about wasting rice. [Here’s my “out” – out of the guilt: however processed Quaker’s cornmeal might be (and I don’t know the extent of it and don’t want to bad-mouth the company), it’s still a corn product that shouldn’t be wasted. This is perhaps today’s alternative to my mother’s directive to “Eat—there are starving children in China.”]

Quaker’s recipe, on the back of the fat cylinder in which their product comes, was called “Easy” but it also looked like it was trying to be lo-cal or lo-fat or both, which is fine so long as there would be plenty of flavor. Reading through the ingredients, however, I wasn’t exactly hopeful about mouth-watering taste; so naturally I fooled around with it. Here are the changes I made (I think I’m remembering them all, but be aware that I only scribbled down what I did do, not how it was different from the Q-recipe):

  • Decreased amount of flour.
  • Increased amount of cornmeal.
  • Used same amount of sugar, but half was evaporated cane juice sugar and half was light brown sugar (I used no standard granulated sugar, which I think was inferred for use in the Q-recipe although they didn’t actually say what kind of sugar to use.).
  • Substituted buttermilk for skim milk.
  • Lightly beat the egg before adding to mixture.
  • Added cheese for flavoring (it all melts into recipe).
  • Added nutmeg.

I toyed with the idea of adding chives and/or parsley (have done this with cornbread before and liked it). Didn’t do it this time, but it’s always an option (as it could be for you!) – went with addition of nutmeg instead.

Here’s the recipe. If and when you decide to make it, think about this: Patricia Telesco’s A Kitchen Witch’s Cookbook (Llewellyn Publications, 1994) lists corn’s “Magical Associations” as “Life of the Land, cycles and eternity.” I don’t think the term “eternity” on this list is meant to encompass living forever on this planet in our current bodies, but there is something eternal about our being. Scientists have determined that there is no new energy in the Universe. Our bodies decompose and become (or more accurately, remain) One with All that exists. I am content with corn symbolizing this eternal cycling and re-cycling. Sure feels sacred to me.

(MAYBE SACRED) CORNBREAD
Yield: I get 16 “slices” of cornbread, but you might like smaller or larger portions!

Ingredients

  • butter to grease the baking pan
  • 1 cup unbleached all-purpose flour
  • 1 cup cornmeal
  • ¼ cup sugar (I split this up between evaporated sugar cane juice and light brown sugar)
  • 2 teaspoons baking powder
  • ¼ teaspoon salt (I used iodized table salt)
  • 1 cup buttermilk
  • ¼ cup olive oil or vegetable oil (I only had olive oil; ran out of canola)
  • 1 egg, lightly beaten
  • ½ cup shredded cheddar or mixture of parmesan/asiago cheeses
  • a couple of dashes of fresh-ground nutmeg, to taste

Process

  1. Preheat oven to 400 degrees.
  2. Generously grease an 8”x 8” or 9”x 9” baking pan (I used a square one) with butter.
  3. Combine dry ingredients – flour, cornmeal, baking powder, sugar and salt – in a large bowl. Whisk together well.
  4. Combine buttermilk, oil, and egg together in another bowl, whisking until mixed.
  5. Add liquid mixture to dry mix; combine with a few strokes of a wooden spoon or spatula.
  6. Fold the cheese(s) into the mixture, and sprinkle nutmeg (if using) over it as well.
  7. Give mixture a last few stirs (do not over-stir) and then pour into prepared pan.
  8. Bake until cornbread is lightly browned and pulling away from side of the pan. A cake tester or butter knife should come out clean when inserted into its center.
  9. Remove from oven and allow to cool for a few minutes before cutting into slices.

I like it when it’s still warm and I can slice it horizontally to insert a skinny pat of butter, which immediately melts to add to the yumminess. Ahhhhh…

LENTIL SOUP – EARTHY RECIPE, UNDER A WATER SIGN!

According to Cunningham’s Encyclopedia of Wicca in the Kitchen (Llewellyn Publications, 2003), lentils – a major staple in many diets around the world – possess the “energy” of Peace. Their element is water (and how would we eat them if we couldn’t cook them in liquid?), despite what I’d describe as an earthy taste, and their “planet” is the Moon (water… tides… get it?). Cunningham says to “eat it for peace.” I envision a whole day designated for making peace in the world, with everyone slurping lentil soup as part of the overall symbolism. On a full stomach, who can make war?

Peace wasn’t what I had in mind, however, when I made a large batch of it recently. It was about the next couple recipes to cover for From Scratch Club on GoodReads. Part of the assignment for FSC was to make another recipe from The Homemade Pantry, selecting from either Chapter 5 (or “Aisle” 5, as author Alana Chernila calls it), which covers Soups, or from Chapter/Aisle 6, entitled “Baking Needs & Mixes.” I made the soup from Aisle 5, then opted for Alana’s Yellow Cake in the following chapter (also made Corn Bread to go with Lentil Soup but not from this cookbook, although quite similar). Today’s post covers how I prepared the Lentil Soup, based on the book’s instructions but with my own revisions.

Dad (right) w/Uncle Champ & cousin Marge

Bill loves lentil soup. I enjoy it and especially like that lentils don’t take a long time to cook! Growing up, however, I don’t remember these tiny “beans” ever being present in our household. It was the 50s and 60s, and convenience foods were big in this country, especially soup-wise (think: Campbell’s).

Mom & Dad (Dolly & George), circa 1969

In our household if homemade soups were conjured up, Dad usually created them. And he had only two in his repertoire: Vegetable Beef and Manhattan Clam Chowder. In truth, they were the same concoction, except the first one got the beef and the flavor it created when the meat chunks were browned, and the chowder included clams (usually Little Necks). Otherwise, pretty much the same vegetables and spices. You’d think that our father’s taking over some cooking once in a while would be a gift to Mom, and she did appreciate it. Until it got to clean-up. It seems that Dad’s short stint as a cook in the army during the war made him prone to producing very large batches of soup, resulting in lots of clean-up detail (which he was perhaps used to leaving to other soldiers to handle). Mom always seemed to be the one handling clean-up in our flat’s tiny kitchen, a space not equipped with “instant” hot water. She had to be sure to light a flame under the gas water tank early on, so she’d have enough hot water to wash all the dishes!

If I need another reason to like lentils, it’s their awesome nutrition profile. 100 Best Health Foods (Love Food, an imprint of Paragon Books, 2009), a book that details health benefits of some foods determined to be best for our bodies and overall well-being, lists their major nutrient levels and further emphasizes that lentils are especially rich in fiber, have a high iron content, and contain plant chemicals to help alleviate PMS symptoms (wish I’d known that a couple decades ago) and aid in bone health. Their high zinc content also boosts the immune system. We’re talking a food that, from ancient times, has nourished the human race (almost 2,000 years before Christ was born, the Egyptians apparently traded lentils for the prized cedars of Lebanon!).

But few people want to be told how good something is for them (try it on a kid—see how far it’ll get you toward convincing them to eat broccoli or Brussels sprouts…). We want to know it tastes good. And this recipe is delicious – hot, earthy mouthfuls of flavor.

Note about this recipe: I adjusted things like:

  • salt (ran out of unsalted butter; used low-sodium soy sauce instead of regular soy)
  • didn’t have white onions on hand (used red)
  • chopped celery instead of minced
  • delayed when to add lentils (used dried red lentils instead of raw green or French lentils, which cook faster and would disintegrate if added early)
  • added parsnip and extra potatoes
  • added a mix of some herbs (some dried, some frozen from pots on my deck this summer).

EARTHY LENTIL SOUP
(with thanks to Alana Chernila for original recipe from which this is derived)
Yield: 8-10 servings

Ingredients

  • 2 tablespoons butter (as noted above, I used salted butter; if using unsalted, adjust for difference)
  • 1 cup chopped onion (white onion ok, but I had milder red ones!)
  • ½ teaspoon fine-ground sea salt (table salt ok), plus more if desired
  • 1 cup peeled, chopped celery (if celery has leaves, use them too!)
  • 1 cup peeled, chopped carrots
  • 1 medium-to-large parsnip, chopped
  • 3 cups dried red lentils
  • 1 dried bay leaf
  • 2 cups peeled and chopped potatoes
  • 7 to 10 cups chicken or vegetable stock (homemade preferred but not required) or water, or any combo of stock and water
  • black pepper, to taste
  • 2 tablespoons fresh lemon juice (from 1 lemon)
  • 1½ tablespoons light brown sugar (yup! who’da thought?!)
  • 1 teaspoon low-sodium soy sauce (according to Alana, tamari is ok too)
  • up to 2 or 3 tablespoons of a combo of parsley, thyme, marjoram and/or oregano (Alana’s recipe calls for most of these [marjoram is my add-on] as garnish; I included them as actual last-minute additions to soup; some of these were frozen from my summer potted herbs, others were dried – all are optional but add nice flavor )

Process

  1. Melt butter in large soup pot over medium heat.
  2. Add onion to butter; sauté for one minute or until shiny.
  3. Add salt, garlic, celery, parsnip and carrots to pan. Cook for an additional 5 minutes, or until aromatic and shiny.
  4. Add bay leaf, potatoes and about 7 cups of stock to the pot. Bring to a boil, then reduce heat to medium-low. Simmer, covered, stirring occasionally, for 45 minutes to an hour.
  5. Stir lentils into pot. Bring to boil again, return to medium-low and cover. Check as it cooks, making sure it does not become too thick or dry; if it does, add more stock or water (I wound up using all 9 cups of stock plus a bit of filtered water). Cook for about another 45 minutes.
  6. Add pepper, brown sugar and soy sauce. Remove bay leaf. Cook for about another 10 to15 minutes.
  7. Add combo of herbs, if using. Simmer an additional 5 to 10 minutes if needed (check doneness of lentils and potatoes to gauge this).
  8. Adjust for salt and pepper, then serve!

LUCIOUS LEMON RICOTTA PANCAKES

This is the second recipe in which I used the Homemade Ricotta made per my recent joining of the From Scratch Club on GoodReads. We’re reading/cooking/baking from The Homemade Pantry: 101 Foods You Can Stop Buying and Start Making by Alana Chernila, a book I highly recommend. My last blogpost, Comfort Pasta with Ricotta, Nutmeg and Peas was the other dish I conjured up, based on a recipe in a cookbook I’ve owned for years. Both were heaven to the tongue.

I found this recipe in a relatively new (to me) cookbook, Baking by Flavor by Lisa Yockelson (John Wiley & Sons Inc., 2002), a volume awarded the IACP Cookbook Award in 2002, which I just learned is an honor given by the International Association of Culinary Professionals to “the authors, publishers, and other contributors behind the best of cookbooks published each year.” Because I love lemon-anything, it caught my attention immediately. As usual, I made a few changes to suit my needs, desires and tastes.

When the kids were growing up, pancakes weren’t on our everyday breakfast menu. It took time to make them, even from a box (and our box was Bisquick, which we found to be better than specifically-pancake/waffle mixes). Life was too hectic to get into time-consuming morning feasts like pancakes, eggs/omelets, French toast and other more elaborate first-thing-in-the-morning endeavors on weekdays. Those were weekend fare, so long as we weren’t driving children all over creation to too-early activities on a Saturday or Sunday! So pancakes were treats, and they remain so.

These Lemon Ricotta Pancakes surpass anything from those days. Bill and I scarfed them down over two days (fresh and heated-up leftovers), savoring every bite, knowing our son wouldn’t be interested anyway. He’d much rather make his own Bisquick batch whenever he feels like it. His loss.

Try ’em—you’ll love ’em.

LEMON RICOTTA PANCAKES FROM SCRATCH
Yield: supposedly, 27 pancakes – but ours were larger, for a smaller yield

Ingredients

  • 1 cup unsifted, unbleached all-purpose flour (original recipe calls for bleached; I only buy unbleached)
  • 1 teaspoon baking powder
  • pinch of salt
  • dash of nutmeg and/or cinnamon (totally my addition- totally optional)
  • ¾ cup whole-milk ricotta cheese (mine was homemade)
  • 3 tablespoons sugar (book calls for granulated; I use organic evaporated cane juice sugar – same texture as granulated)
  • 1 teaspoon freshly grated lemon zest (lemon-love-me probably made that at “generous” teaspoonful!)
  • 2 large eggs, slightly beaten with a whisk (original recipe doesn’t call for whisked eggs; this is my move so the whisk part is optional)
  • ¾ cup milk (I used 2%, but whole is fine; buttermilk would also work to add more tang)
  • 4 tablespoons (½ stick) unsalted butter, melted and cooled to tepid
  • ½ teaspoon pure lemon extract
  • butter, for the grill (book calls for clarified butter, but I used regular unsalted)
  • fresh fruit, for topping (optional – my idea, not the cookbook author’s)
  • confectioners’ sugar, for sprinkling on pancakes

Process

  1. Sift flour, baking powder, salt, nutmeg (if using) and cinnamon (if using) into medium-sized bowl.
  2. Blend ricotta, sugar, lemon zest and eggs in small bowl, using wooden spoon or paddle.
  3. Blend milk, melted butter and lemon extract into ricotta mixture.
  4. Blend ricotta mixture into the sifted flour ingredients, stirring until it becomes an evenly textured batter (use wooden spoon or paddle). Batter will be moderately thick.
  5. Place 2-tablespoon scoops (or use a little more, if preferred) of batter onto a hot griddle greased with butter; cook for about 1 minute or until undersides are golden and bubbles appear on surface. Flip over with a spatula and continue cooking for about another minute (until golden brown on bottom).
  6. Serve with fresh fruit topping, if desired.
  7. Sift confectioners’ sugar atop pancakes (and fruit, if serving), also if desired. I can imagine whipped cream instead of the confectioners’ sugar – but only the real stuff, not what comes frozen in a plastic tub!