IT AIN’T ALL ABOUT THE BIRD – STUFFING CAN MAKE OR BREAK THE T-DAY MEAL (BUT IT ALL STARTS WITH THE BIRD… and the bread!)

tksday 11-12_068

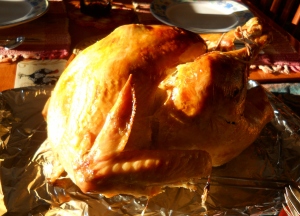
On the other hand, there are so many considerations about that bird and the stuffing to go with it, before we even get to the roasting/eating part:

  • How big a bird? (Definitely want leftovers. Ours was a 17+ pounder.)
  • What else about the bird? (Bought a “natural, fresh” turkey this year. Generally winds up juicier.)
  • To brine or not to brine? (Never tried it, wasn’t about to this time.)
  • If not brining, how to ensure it’s nice and moist? (I loosened the skin and injected homemade turkey broth.)
  • What about flavoring for the skin? (Basting with melted butter can’t be beat; sprinkled with pepper and a few herbs such as dried parsley, marjoram, thyme and/or rosemary.)
  • What to do with all the “stuff” that’s inside? (Take the “stuff” – gizzards, heart, etc, out of the bird, put in saucepan, add water to cover, sprinkle with salt and pepper, bring to boil, then simmer until liquid is reduced by ⅓ to ½. Discard “stuff” and put aside liquid for later gravy-making.)
  • How about the inside of the turkey? (Always rub with salt. Further, I considered two options: either cut a lemon in half and pull some frozen “fresh” rosemary out of the freezer, then stash it in the bird’s cavity; OR fill it with stuffing. I went with option #2.)
  • How long do I cook it and at what temp? (I always look to see if it gives hourly rates on the fowl’s packaging. If not, I check one of my many cookbooks or go online. I never seem to retain this kind of info in my brain, or maybe I just worry too much about screwing it up! I do recall that 325 degrees Fahrenheit is the best temp. Still, I try to buy a bird with one of those pop-up gadgets that tells you it’s done, and then I’ll use a meat thermometer to check doneness anyway!)
  • How to get it properly done without burning the skin? (I cover with aluminum foil until about the last hour in the oven. Then I remove the foil and baste a few times during next hour to ensure nice browning.)

Those are my Basics About the Bird. Not a recipe, just a guideline. Because this post is really about the stuffing. No, it’s about the prelude to the stuffing: the croutons that make up its bulk.

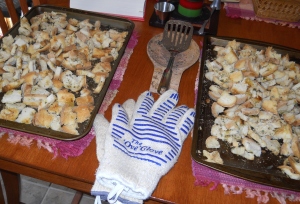
Prep for the stuffing began the day before Thanksgiving, with concocting homemade croutons (not all of these would go into the stuffing either—some were ground into bread crumbs for sprinkling atop potato casserole). I was determined that, this year, I would not buy a single bag of those pre-made croutons found in the supermarket. Their listing of ingredients includes whatever additives the manufacturer deems necessary to make sure the little dried-out bread bits stay dry, don’t mold, manage to last from factory to store to your house – which probably means that, even if not bk food rulesdeemed toxic by the government, there are still ingredients in that bag that your (or my) grandmother would not recognize as food. (Rule #2 in Michael Pollen’s Food Rules: An Eater’s Manual [Penguin Press, 2009, 2011]: “Don’t Eat Anything Your Great Grandmother Wouldn’t Recognize as Food.” I happen to be old enough that I can eliminate the “Great” since my Grandmothers were born in the late 1800s! Also note that Pollen’s Rule #3 is, “Avoid Food Products That No Ordinary Human Would Keep in the Pantry,” which means all of those ingredients on labels that I can’t pronounce, let alone remember…).

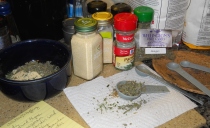
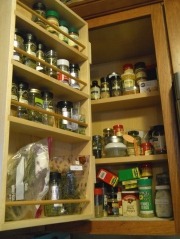
I started with a good loaf of Italian bread from Bella Napoli Bakery and I used excellent dried spices, many of which I purchase at the Schenectady Green Market. There’s a great vendor there, March through mid-December (they head south for the winter) called Wellington’s Herbs & Spices, out of Schoharie County. In fact, I’m super-glad I made it to the Green Market today – needed more dried parsley (I use a ton of it) – because I learned that next week is their last SGM Sunday until March. This means I will do my best to get back there next weekend, after assessing my stock of dried herbs, to be sure I have an adequate supply for several months!

tksday 11-12_031

tksday 11-12_030

But I digress… back to the croutons. And a little kitchen magic.
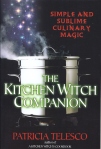
ckbk kitwitch companionIf you’ve been checking out KitchenCauldron for a while, you know I sometimes like to throw in a bit about the “magical associations” of food, which often can be connected to what science has discovered about the healing (and sometimes detrimental) properties of food. I like that one of the tenets of Patricia Telesco’s “Kitchen Witch’s Credo,” as set forth in her book The Kitchen Witch Companion: Simple and Sublime Culinary Magic (Citadel Press, Kensington Publishing Corp., 2005) reads, “There is nothing on this earth that cannot be used for magic.” She also states, “Life is a ritual and act of worship,” and “Kitchen witchery always reflects your own principles.” I believe our “principles” are developing and re-developing over our entire lifetime. A couple of decades ago I might have thought creating croutons in my own kitchen was cool but Pollen’s Rules #2 or #3 wouldn’t have come into the picture. I am older, somewhat wiser and much more worried about the fate of this planet and its inhabitants than decades ago.

As one of those earth-bound occupants, I find it soothing to know that bread is associated with kinship and sustenance (think “communion”); that parsley and garlic are endowed with protective energies (and parsley might also enhance one’s luck); that coriander denotes love, well-being and intelligence; that marjoram’s magical properties are said to include peace and love. It’s interesting to me that the sage sprinkled over my croutons speaks of wisdom and ckbook witch in kitchredemption, and that its thyme could aid in banishing nightmares. Cait Johnson, in Witch in the Kitchen: Magical Cooking for All Seasons (Destiny Books, 2001), writes, “Our culture considers cooking a chore; we are encouraged to get it over with as quickly as possible. But it may help us to remember that cooking was once a magical act. Cooks were priestesses who wielded the power of fire, transforming raw ingredients into nourishment for themselves and their families. The act of cooking linked women with the Goddess, the Great Nurturer.” In a fundamental way, women (and men too) are empowered through their ability to cook/bake. This is true alchemy.

So think of this as a simple bit of alchemy, transforming bread into gourmet-like croutons – which can make stuffing scrumptious, enhance favorite soups and be further transmuted into tasty bread crumbs to top all sorts of dishes.

tksday 11-12_035

EASY-TO-MAKE, (Maybe) MAGICAL CROUTONS
Yields two large cookie sheets full of croutons (maybe 5-6 cups?)

Ingredients

  • One large loaf Italian bread, sliced into cubes about ½’ to ¾” square
  • 5-6 tablespoons olive oil
  • 1 tablespoon dried thyme
  • 1 tablespoon dried marjoram
  • 1 teaspoon coriander seed
  • 2 tablespoons dried parsley
  • 1 tablespoon garlic granules
  • ½ teaspoon dried basil
  • 2 tablespoons dried sage

Process

  1. Pre-heat the oven to 375 degrees Fahrenheit.
  2. Grease two large cookie sheets with one tablespoon of olive oil each.
  3. Spread the bread cubes out over both sheets, trying not to overlap any.
  4. Combine thyme, marjoram, coriander, parsley, garlic granules, basil and sage in a bowl and mix together welltksday 11-12_032
  5. Sprinkle the dried herb mixture over all the croutons.
  6. Sprinkle the remaining olive oil over the herb-sprinkled bread cubes.
  7. Bake in oven until turning golden-crunchy, using a spatula to turn cubes over after about 10 minutes (don’t panic if you can’t get all of them turned – it will work out just fine!). Toasting should take from 20 to 25 minutes, but start checking earlier and keep an eye on their progress. Ovens vary, temperature-wise.
  8. Remove from oven and allow to cool completely.
  9. Store in a plastic bag until using the next day in stuffing or other recipe. Or store for up to a week. (To make bread crumbs, just toss into food processor and process for a minute or two until they reach desired consistency.)

tksday crouton 11-12_036

Next blog entry: the stuffing!

SWEET’NING UP THE CHILI – BUT NOT TOO MUCH: PUMPKIN/SWEET POTATO CHILI WITH BEANS & CHICKEN

At home, we ate our pumpkin chili with melted cheddar cheese atop!

It’s that time of year again- food, food, food. The holidays aren’t just about gifting and – for church, synagogue, mosque and temple goers – celebrating a holy event. They’re about gathering together of family and friends, enjoying each other’s company. And that means, “Feed ’em!” But this also entails remembering that not everyone lives in the best of circumstances, especially in these tough economic times. We may struggle to keep up with the bills and pay for transportation to work or the grocery store and other basics, but not everyone has a job to go to or even enough to eat. So it’s important to somehow “pay it forward” (as that movie so poignantly advised). Today’s recipe, in honor of all holidays from Thanksgiving through the end of December, is the chili recipe I created for daughter Kristen’s workplace chili & bake sale / raffle & silent auction – an event that raises money for charity.

Last year was the first year I contributed a large batch of chili for the sale, and this year I decided to bake as well. Cheesey Cornbread (with extra cheese) to go with the chili and Cardamon Risotto Cookies (a twist on my regular Risotto Cookies, with sugar-cinnamon also replacing the frosting). Then, at the last minute (several hours before we were to deliver food to the office), I decided to throw in some Banana Chocolate Chip Muffins (bananas too ripe for me to eat on cereal – I like ’em when there’s a little green left on the peel!). The muffin recipe will follow in another blog entry.

A busy, delicious two days (well, you didn’t think I was going to whip up all that good stuff and not indulge myself?!), and a lucky time too. After the sale was over, Kris called. I thought she was simply letting me know how much they’d brought in. This year’s proceeds are being split between the local food pantry and agencies providing aid to New York City and Long Island victims of Hurricane Sandy. After Kristen told me they’d raised well over $5,000 (eventual total was $5,700), I was about to hang up when she called out, “Wait! You won one of the raffle baskets!”

Not only did I win a raffle basket, it was The One I’d hoped to get, if I won anything at all (which I wasn’t expecting). The huge plastic container included a 19” television and a ROKU with 6-month subscription to Netflix. We already enjoy Netflix so that’s a nice credit on our account, but I was thrilled to acquire a small TV for my downstairs office/artroom (for when it is finally remodeled, which Bill promises will happen after Christmas, although other work on upstairs might take precedence). It won’t be anything fancy but homey enough for me! Oh yeah—the theme of the basket was “Holiday Movie Night” and the box was also packed with things like a warm (red) throw, peppermint cocoa mix, a Santa mug, a dark & white chocolate peppermint bark candy bar, and microwave popcorn. (The candy bar did not last long. I love peppermint bark.)

In addition to such good fortune, I was pleased to hear that all of my chili disappeared into the mouths of many of my daughter’s co-workers. Kris said there were plenty of positive remarks. Apparently, several of them are interested in seeing the recipe on Kitchen Cauldron when posted. One woman made a point of approaching Kristen afterward to say it was the best chili she’d ever tasted! I have to agree with that statement because I think it’s the best chili recipe I’ve ever conjured up. Bill and I enjoyed it immensely at dinner that night.

Here’s hoping you give it a try and really like it too. Don’t be put off by what looks like a long list of ingredients. Once the peeling and chopping is done, it’s mostly about getting the stuff into the pot and simmering. Really easy, as chili generally tends to be.

PUMPKIN/SWEET POTATO CHILI (WITH BEANS AND CHICKEN)
Yield: Depending upon quantity of beans & if including chicken, makes 8-10 quarts of chili

Ingredients

  • 2 large sweet potatoes, peeled and cubed
  • 1 tablespoon parsley
  • 2 tablespoons butter
  • 1 or 2 boneless, skinless chicken breasts, cut into ½” to ¾” pieces (optional, especially if you’re a vegetarian)
  • 1 tablespoon olive oil, plus 1 tablespoon butter
  • 4 medium-to-large onions, peeled and chopped (large or small pieces, whatever your taste)
  • 3 celery stalks, peeled and chopped (including leaves, if any on stalk)
  • 2 large carrots, peeled and chopped into small pieces
  • 6 peppers (I used 2 yellow and 4 green), seeded and chopped
  • salt & pepper to sprinkle over veggies
  • 4 or 5 garlic cloves, peeled and diced (I had roasted some, so I used the paste from those cloves)
  • 1 29-oz. can pumpkin purée (NOT pumpkin pie mix)
  • 2 14.5 oz. cans diced tomatoes
  • 1 15-oz. can tomato sauce
  • 4 cups vegetable stock, plus 4 cups chicken stock (or use any combo of these stocks, or just one type; homemade preferred by not required)
  • 3-4 tablespoons chili powder (more if you prefer)
  • 1 teaspoon ground cumin
  • ½ teaspoon red pepper flakes
  • 1 generous teaspoon ground cinnamon
  • ¼ teaspoon ground nutmeg
  • ¼ teaspoon mace (optional, but I would always use it; if you don’t have it, could increase nutmeg)
  • ¼ teaspoon ground clove
  • ¼ teaspoon ground cardamom (optional; I meant to add this & forgot!)
  • 2 tablespoons dried parsley
  • a few sprinkles dried marjoram (optional- not required if you don’t have on hand)
  • 1 to 2 teaspoons salt (I used combo of table salt and sea salt)
  • 1 to 2 teaspoons black pepper
  • 4 to 6 cans beans – I used dark red kidney, black, great northern, aduki and pink beans, as well as chickpeas
  • additional salt and pepper, if desired
  • possibility: more stock (or water) or some tomato paste, if a thinner or thicker chili is desired

Process

  1. Pre-heat oven to 400 degrees Farenheit. Place sweet potatoes in an oven-friendly dish or pan, dab with the butter and sprinkle with dried parsley. Bake until fork slips through chunks but they aren’t likely to disintegrate after additional cooking in chili sauce. I use a spatula to turn once in a while. (I also cover with aluminum foil for first 15 minutes or so, then remove so they get a bit browned.) This should take perhaps 30-40 minutes but begin checking earlier. Remove from oven and set aside until ready to add to chili. NOTE: this can be done the day before, if you like.
  2. In a large stock pot, heat the oil plus butter on medium level. Add chicken and sautée just to lightly brown (don’t worry if completely cooked through). (About 4-5 minutes.)
  3. Add onion, celery, carrot and peppers. Spinkle lightly with salt and pepper. Sautée for about 2-3 minutes.
  4. Add garlic to pot, sautéing for another minute (be careful – garlic easily burns).
  5. Stir in pumpkin purée, tomatoes and tomato sauce, combining well.
  6. Stir in chicken and/or vegetable stock.
  7. Add chili powder, cumin, red pepper flakes, cinnamon, nutmeg, mace (if using), clove, cardamom (if using), parsley, marjoram (if using), salt and pepper.
  8. Simmer over medium-low heat for about an hour.
  9. In the meantime, drain and rinse the canned beans.
  10. After the contents of the stock pot has simmered for the suggested time, stir beans into chili. Bring back to a simmer and continue to cook for another 20 to 30 minutes.
  11. Add roasted sweet potatoes. Simmer for another 20 to 30 minutes.
  12. Taste for seasoning. Add salt and/or pepper, if desired.

Serve with cornbread on the side or some excellent artisan bread. Nice with shredded cheddar cheese atop, or a dab of sour cream.

In my experience, chili tastes even better as a leftover. Like any tomato-based dish, the flavor deepens as it sits in the fridge. It also freezes really well. Make some for a crowd, and reserve some for you and yours too!

LENTIL SOUP – EARTHY RECIPE, UNDER A WATER SIGN!

According to Cunningham’s Encyclopedia of Wicca in the Kitchen (Llewellyn Publications, 2003), lentils – a major staple in many diets around the world – possess the “energy” of Peace. Their element is water (and how would we eat them if we couldn’t cook them in liquid?), despite what I’d describe as an earthy taste, and their “planet” is the Moon (water… tides… get it?). Cunningham says to “eat it for peace.” I envision a whole day designated for making peace in the world, with everyone slurping lentil soup as part of the overall symbolism. On a full stomach, who can make war?

Peace wasn’t what I had in mind, however, when I made a large batch of it recently. It was about the next couple recipes to cover for From Scratch Club on GoodReads. Part of the assignment for FSC was to make another recipe from The Homemade Pantry, selecting from either Chapter 5 (or “Aisle” 5, as author Alana Chernila calls it), which covers Soups, or from Chapter/Aisle 6, entitled “Baking Needs & Mixes.” I made the soup from Aisle 5, then opted for Alana’s Yellow Cake in the following chapter (also made Corn Bread to go with Lentil Soup but not from this cookbook, although quite similar). Today’s post covers how I prepared the Lentil Soup, based on the book’s instructions but with my own revisions.

Dad (right) w/Uncle Champ & cousin Marge

Bill loves lentil soup. I enjoy it and especially like that lentils don’t take a long time to cook! Growing up, however, I don’t remember these tiny “beans” ever being present in our household. It was the 50s and 60s, and convenience foods were big in this country, especially soup-wise (think: Campbell’s).

Mom & Dad (Dolly & George), circa 1969

In our household if homemade soups were conjured up, Dad usually created them. And he had only two in his repertoire: Vegetable Beef and Manhattan Clam Chowder. In truth, they were the same concoction, except the first one got the beef and the flavor it created when the meat chunks were browned, and the chowder included clams (usually Little Necks). Otherwise, pretty much the same vegetables and spices. You’d think that our father’s taking over some cooking once in a while would be a gift to Mom, and she did appreciate it. Until it got to clean-up. It seems that Dad’s short stint as a cook in the army during the war made him prone to producing very large batches of soup, resulting in lots of clean-up detail (which he was perhaps used to leaving to other soldiers to handle). Mom always seemed to be the one handling clean-up in our flat’s tiny kitchen, a space not equipped with “instant” hot water. She had to be sure to light a flame under the gas water tank early on, so she’d have enough hot water to wash all the dishes!

If I need another reason to like lentils, it’s their awesome nutrition profile. 100 Best Health Foods (Love Food, an imprint of Paragon Books, 2009), a book that details health benefits of some foods determined to be best for our bodies and overall well-being, lists their major nutrient levels and further emphasizes that lentils are especially rich in fiber, have a high iron content, and contain plant chemicals to help alleviate PMS symptoms (wish I’d known that a couple decades ago) and aid in bone health. Their high zinc content also boosts the immune system. We’re talking a food that, from ancient times, has nourished the human race (almost 2,000 years before Christ was born, the Egyptians apparently traded lentils for the prized cedars of Lebanon!).

But few people want to be told how good something is for them (try it on a kid—see how far it’ll get you toward convincing them to eat broccoli or Brussels sprouts…). We want to know it tastes good. And this recipe is delicious – hot, earthy mouthfuls of flavor.

Note about this recipe: I adjusted things like:

  • salt (ran out of unsalted butter; used low-sodium soy sauce instead of regular soy)
  • didn’t have white onions on hand (used red)
  • chopped celery instead of minced
  • delayed when to add lentils (used dried red lentils instead of raw green or French lentils, which cook faster and would disintegrate if added early)
  • added parsnip and extra potatoes
  • added a mix of some herbs (some dried, some frozen from pots on my deck this summer).

EARTHY LENTIL SOUP
(with thanks to Alana Chernila for original recipe from which this is derived)
Yield: 8-10 servings

Ingredients

  • 2 tablespoons butter (as noted above, I used salted butter; if using unsalted, adjust for difference)
  • 1 cup chopped onion (white onion ok, but I had milder red ones!)
  • ½ teaspoon fine-ground sea salt (table salt ok), plus more if desired
  • 1 cup peeled, chopped celery (if celery has leaves, use them too!)
  • 1 cup peeled, chopped carrots
  • 1 medium-to-large parsnip, chopped
  • 3 cups dried red lentils
  • 1 dried bay leaf
  • 2 cups peeled and chopped potatoes
  • 7 to 10 cups chicken or vegetable stock (homemade preferred but not required) or water, or any combo of stock and water
  • black pepper, to taste
  • 2 tablespoons fresh lemon juice (from 1 lemon)
  • 1½ tablespoons light brown sugar (yup! who’da thought?!)
  • 1 teaspoon low-sodium soy sauce (according to Alana, tamari is ok too)
  • up to 2 or 3 tablespoons of a combo of parsley, thyme, marjoram and/or oregano (Alana’s recipe calls for most of these [marjoram is my add-on] as garnish; I included them as actual last-minute additions to soup; some of these were frozen from my summer potted herbs, others were dried – all are optional but add nice flavor )

Process

  1. Melt butter in large soup pot over medium heat.
  2. Add onion to butter; sauté for one minute or until shiny.
  3. Add salt, garlic, celery, parsnip and carrots to pan. Cook for an additional 5 minutes, or until aromatic and shiny.
  4. Add bay leaf, potatoes and about 7 cups of stock to the pot. Bring to a boil, then reduce heat to medium-low. Simmer, covered, stirring occasionally, for 45 minutes to an hour.
  5. Stir lentils into pot. Bring to boil again, return to medium-low and cover. Check as it cooks, making sure it does not become too thick or dry; if it does, add more stock or water (I wound up using all 9 cups of stock plus a bit of filtered water). Cook for about another 45 minutes.
  6. Add pepper, brown sugar and soy sauce. Remove bay leaf. Cook for about another 10 to15 minutes.
  7. Add combo of herbs, if using. Simmer an additional 5 to 10 minutes if needed (check doneness of lentils and potatoes to gauge this).
  8. Adjust for salt and pepper, then serve!

LUCIOUS LEMON RICOTTA PANCAKES

This is the second recipe in which I used the Homemade Ricotta made per my recent joining of the From Scratch Club on GoodReads. We’re reading/cooking/baking from The Homemade Pantry: 101 Foods You Can Stop Buying and Start Making by Alana Chernila, a book I highly recommend. My last blogpost, Comfort Pasta with Ricotta, Nutmeg and Peas was the other dish I conjured up, based on a recipe in a cookbook I’ve owned for years. Both were heaven to the tongue.

I found this recipe in a relatively new (to me) cookbook, Baking by Flavor by Lisa Yockelson (John Wiley & Sons Inc., 2002), a volume awarded the IACP Cookbook Award in 2002, which I just learned is an honor given by the International Association of Culinary Professionals to “the authors, publishers, and other contributors behind the best of cookbooks published each year.” Because I love lemon-anything, it caught my attention immediately. As usual, I made a few changes to suit my needs, desires and tastes.

When the kids were growing up, pancakes weren’t on our everyday breakfast menu. It took time to make them, even from a box (and our box was Bisquick, which we found to be better than specifically-pancake/waffle mixes). Life was too hectic to get into time-consuming morning feasts like pancakes, eggs/omelets, French toast and other more elaborate first-thing-in-the-morning endeavors on weekdays. Those were weekend fare, so long as we weren’t driving children all over creation to too-early activities on a Saturday or Sunday! So pancakes were treats, and they remain so.

These Lemon Ricotta Pancakes surpass anything from those days. Bill and I scarfed them down over two days (fresh and heated-up leftovers), savoring every bite, knowing our son wouldn’t be interested anyway. He’d much rather make his own Bisquick batch whenever he feels like it. His loss.

Try ’em—you’ll love ’em.

LEMON RICOTTA PANCAKES FROM SCRATCH
Yield: supposedly, 27 pancakes – but ours were larger, for a smaller yield

Ingredients

  • 1 cup unsifted, unbleached all-purpose flour (original recipe calls for bleached; I only buy unbleached)
  • 1 teaspoon baking powder
  • pinch of salt
  • dash of nutmeg and/or cinnamon (totally my addition- totally optional)
  • ¾ cup whole-milk ricotta cheese (mine was homemade)
  • 3 tablespoons sugar (book calls for granulated; I use organic evaporated cane juice sugar – same texture as granulated)
  • 1 teaspoon freshly grated lemon zest (lemon-love-me probably made that at “generous” teaspoonful!)
  • 2 large eggs, slightly beaten with a whisk (original recipe doesn’t call for whisked eggs; this is my move so the whisk part is optional)
  • ¾ cup milk (I used 2%, but whole is fine; buttermilk would also work to add more tang)
  • 4 tablespoons (½ stick) unsalted butter, melted and cooled to tepid
  • ½ teaspoon pure lemon extract
  • butter, for the grill (book calls for clarified butter, but I used regular unsalted)
  • fresh fruit, for topping (optional – my idea, not the cookbook author’s)
  • confectioners’ sugar, for sprinkling on pancakes

Process

  1. Sift flour, baking powder, salt, nutmeg (if using) and cinnamon (if using) into medium-sized bowl.
  2. Blend ricotta, sugar, lemon zest and eggs in small bowl, using wooden spoon or paddle.
  3. Blend milk, melted butter and lemon extract into ricotta mixture.
  4. Blend ricotta mixture into the sifted flour ingredients, stirring until it becomes an evenly textured batter (use wooden spoon or paddle). Batter will be moderately thick.
  5. Place 2-tablespoon scoops (or use a little more, if preferred) of batter onto a hot griddle greased with butter; cook for about 1 minute or until undersides are golden and bubbles appear on surface. Flip over with a spatula and continue cooking for about another minute (until golden brown on bottom).
  6. Serve with fresh fruit topping, if desired.
  7. Sift confectioners’ sugar atop pancakes (and fruit, if serving), also if desired. I can imagine whipped cream instead of the confectioners’ sugar – but only the real stuff, not what comes frozen in a plastic tub!

COMFORT PASTA (WITH RICOTTA, NUTMEG & PEAS) – QUICK & EASY!

Most pasta – no matter what kind or how prepared – qualifies as comfort food for me. The old standard Macaroni and Cheese ranks #1 in my book, probably because it was a my mother’s dish my mother often served. She tossed together canned, diced tomatoes and American processed cheese – plus elbow macaroni and whole milk (no one even hear of 1% or 2% milk back then, and skim was too skimpy). That’s about it, except for salt, pepper and maybe a little garlic salt if she had it. It was always delicious. I make a sort-of version of hers about once a month, although with different (and alternating) cheeses, but I often hunger for something a little different.

Uncle Champ (Frank), Aunt Mary with cousin Mary; circa 1950.

Then there was Aunt Mary’s spaghetti and meatballs. It was a super-treat to get invited to Aunt Mary and Uncle Champ’s house for the ultimate Italian dinner back-in-the-day. After all, Aunt Mary’s parents were Italian immigrants from Puglia — this was a genuine recipe! Her meatballs became forever the ultimate high standard against which all meatballs were measured, at least as far as Mom was concerned. When the family (my brothers and I and our families) took her out for her 70th birthday to a celebrated Italian restaurant in Albany, allegedy the place where former Governor Mario Cuomo preferred to eat when doing Italian, she naturally order spaghetti with meatballs. Asked how the meatballs were, she replied, “They were pretty good.” Not great. Just pretty good.

Decades ago, my cousin Mary gave me her mother’s recipe but I tend to go off on my own where these things are concerned, so I’ve only made it a few times. It requires cooking at least overnight, until a chicken breast literally dissolves in the tomato richness. And there’s more than just meatballs involved—sausage comes into it as well. A lengthy project. Still, it holds such an honored place in my personal history that it even worked its way into a poem I wrote some years ago, which just posted on this blog’s Food for Thought: Getting Literate page, for your reading pleasure.

Dolly (Mom) out to dinner on 70th birthday, at head of table. 1997.

When Mom (Dolly) made spaghetti sauce it could be okay or it might be what I dubbed as her “cardboard sauce.” She’d give me a dirty look when I used that term, or would comment, “And how would you know what cardboard tastes like?” It was clear she was inferring that we ate pretty decently. Dad ran a tiny grocery store in the South End of Albany (he worked there for something like 14 years; later owned it –the business, not the building- for a few years before he became too disabled by a stroke to work). We often get leftovers where meats were concerned, the ones not sold to his customers, but there was always a decent roast on Sunday for dinner. And the Grand Union was less than a half-block away for items Dad didn’t sell or couldn’t tote home after work in a taxi.

In retrospect, I should’ve called that not-so-great sauce “Mom’s hurry-up” meal. Most likely, she just didn’t feel like cooking that night! Who wants to prepare an all-night affair, or even your own one-to-two-hour sauce, when there’s an easy way out- especially when you can get invited for The Real Deal and walk just a few blocks to consume it with lots of family?

Seems natural that I’d look for an easy-to-prep pasta dish for some of the homemade ricotta I’d made (see previous blogpost, dated October 4, 2012). I checked out a fav cookbook that’s been on my shelf for years, The Best 125 Meatless Pasta Dishes by Minday Toomay and Susann Geiskopf-Hadler (Prima Publishing, 1992), and found Ricotta with Nutmeg and Peas. Nutmeg being a favorite spice of mine, plus knowing it goes great with cheese of almost any kind, it was no contest about this selection.

The dish went over big with both Bill and Adrian. I loved it and will make it again. Of course, I made it my own with a few changes (which are noted) – the big one, of course, being that I used my homemade ricotta, made with whole milk.

Comfort Past (with Ricotta, Nutmeg and Peas)
Yields 4-5 servings

Ingredient

  • 15 oz. homemade whole-milk ricotta (or store-bought part-skim), at room temperature
  • 4 tablespoon unsalted butter, at room temperature
    …with homemade ricotta!
  • 1 to 1 ½ cups peas (frozen or fresh – I used frozen)
  • ½ teaspoon nutmeg, freshly grated preferred (but ok to use jarred)
  • a dash of cinnamon (optional, my addition- not in original recipe)
  • ¼ teaspoon salt (I use sea salt, but table salt ok)
  • a few twists of the pepper grinder, to taste
  • ½ cup Parmesan cheese, finely grated
  • 12-14 ounces dried pasta (recipe said 12 ounces but I knew I could stretch it!; recipe also recommended small tubes or spirals but I used angel hair, our favorite, and it was great)
  • additional Parmesan and nutmeg, as needed and/or desired

Note: it’s important that ingredients be at room temperature, since nothing except the pasta will be heated!

Process

  1. Cook the pasta to al dente in a pot of several quarts of boiling water, adding the peas for the final two minutes. (In Italian, “al dente” means “to the tooth” which suggests that the tooth should meet a little resistance when it meets the noodle. The packaging for your pasta should give you guidelines for how long that particular pasta takes to make it to this stage.)
  2. Meanwhile, mash ricotta and butter in a large bowl, along with nutmeg, cinnamon (if using), salt and pepper.
  3. Set the bowl in warm spot on the stove while waiting for pasta and peas to cook.
  4. Drain the pasta and peas, allowing a bit of water to remain with the noodles and veggies.
  5. Toss the ricotta mix with the Parmesan in the warm bowl.
  6. Add the pasta and peas to bowl with ricotta/Parmesan mixture, and mix it all together using tongs or a forks.
  7. Serve (on warmed plates, if you like) sprinkled with additional Parmesan and a little nutmeg, if desired.

EGG ON MY FACE, POTATO IN MY SOUP, ICING ON THE (CUP)CAKE

There’s an expression here in the USA that might not be familiar to some of my blog followers in other countries. “Egg on My Face” could be a phrase translated to mean, “What was I thinking?” (as in, “Was I thinking at all?”); but more often it’s a big fat “OOPS!” (as in, “How could I do something so stupid?”). In the case of a blog, as in KitchenCauldron, it’s about somehow screwing up the post. Which usually isn’t so bad when it’s just a typo, or one edited-out phrase where the writer failed to take out a word or two (or took out one too many words) – these things mostly are “understood” by the reader and quietly revised when noticed by the blogger.

But in a recipe, the list of ingredients must include all of the ingredients. How else does the cook ensure s/he’s in possession of all necessities for re-creating the recipe?

A couple days ago, I decided I would re-create one of the soups posted on KC, but without the chicken. Basic Potato-Leek Soup (with carrot). Our Spiritual Alchemy group was meeting at Leslie’s again, and the other four of us decided we would be The Makers of the Feast rather than allow Leslie to once again exhaust herself to “make it nice.” (Of course, this didn’t stop her from putting out “just some things already in the fridge and pantry…” but our planning did manage to hold her in check somewhat. Who can blame her—she loves to entertain, especially for her writing/art sisters!)  I’d said I’d bring a soup and would also bake if there was time. Yesterday morning I realized I had to bake – it was imperative that I somehow incorporate four almost-overripe bananas (hanging on the “banana hook” atop our kitchen counter) into something, or they’d go to waste! Luckily, I was out of bed and functioning way-early, with plenty of time before our group met. And so it was that I toted Potato-Leek Soup and Gluten-Free Banana Muffins to Leslie’s.

Since the batch of Potato/Leek with Chicken Soup in my January 30th post turned out so great, I went back to my printed recipe (yes, I eventually print all my foodblog posts, put them in binders and easily refer to them when needed). Much to my surprise and chagrin I discovered that, while I’d included the potatoes in the “Process” part of the post (“Bring to a boil, reduce heat and simmer, covered, for 25 to 30 minutes – or until potato is tender.”), I’d failed to add potatoes to the “Ingredients” list! Major faux pas. Since then, I’ve corrected the recipe and mentally whipped myself several times for screwing up on proofreading! I have to assume that no one viewing that post has yet tried to make the soup (since there were no complaints or gentle references to something missing) but, just in case anyone printed the recipe, it will have to be re-printed for an accurate rendition (or note the changes by pen or pencil on the copy). I apologize for any convenience.

My minus-the-chicken version, by the way, was a big hit at Leslie’s (with Greek yogurt and gluten-free crouton toppings) – as were the muffins (recipe for latter to be posted at a later date).

Some of that “egg on my face” also comes from my recent, too-long unblogged space on KC. Or, to use an even more appropriate American idiom, turning it into a pun for the recipe in this post, it’s “the icing on the cake” (as in, “added to all the other stuff, this happened”; or, “I have to admit to this…”). Between the business of life lately and, I confess, getting caught up in reading a few books, I haven’t gotten back to the computer except for e-mail and a few Facebook comments. I’ve managed to post some pieces on the KC Food for Thought page, but making those additions are less time-consuming than including a posting with story and recipe.

In my April 6th post, I promised to provide the rest of the recipes from WomanWords’ 15-Year Birthday Reading soon. Honest – they’re all coming! And there are so many other recipes backed-up. And food-related books I want to blog about. I could huddle down, drafting and posting, in my little office/art/writing space and not surface for a couple weeks for anything but food, water and the bathroom – but then I expect the quality of my offerings would begin to deteriorate within a few days (and there’d be no time to cook!). I am a social creature, requiring interaction with friends and family, and a bit of fresh air as well (although I am far from an outdoorsy type!), and so I’ll just do the best I can with this blogging thing.

In the meantime, in the catching-up phase, I’m now providing the frosting recipe for those Heavenly Chocolate Cupcakes served at Caffè Lena during our celebration. It’s easy to make and would also be a great topping for your best white cake (I love white cake with chocolate frosting!).

A quick tip of the (witch’s) hat to the magical aspect of hazelnuts, a major ingredient in the Nutella used in this recipe: According to Cunningham’s Encyclopedia of Wicca in the Kitchen (Llewellyn Publications, 2003), the hazelnut’s energies encompass wisdom, conscious mind and fertility. The tree itself, with its round nuts, “played important roles in European folklore and folk religion.” It was linked to sky deities and considered a guardian against lightning, bad storms and fire. While I’m not about to stand under any tree in a lightning storm, I found this interesting. (Hmm, when Hurricane Irene hit this area last August, maybe we could’ve used a few hazelnut trees…) On the other hand, I’m not averse to munching on a few of the delicious nuts on occasion – whether to enhance wisdom or purely for pleasure. And a little fertility where creativity’s concerned wouldn’t hurt either.

HEAVENLY NUTELLA FROSTING
(Yields enough for at least 2½ to 3 dozen cupcakes.)

Ingredients

  • 1½ sticks butter, softened to room temperature (12 tablespoons)
  • 3 cups confectioners’ sugar (more or less)
  • 4 to 6 tablespoons milk (I use 2% but any will do, from skim to full-fat)
  • 1 jar Nutella hazelnut spread (or other hazelnut spread), although you may not use entire jar
  • dash of cinnamon

Process

  1. In a large bowl, beat together all of the butter, about half of the sugar and half of the jar of Nutella. If the mixture is too stiff for beating, add a tablespoon or two  milk.
  2. Add remaining sugar, gradually, and continue to beat ingredients together until smooth, adding a bit more Nutella (1/4 cup?) as well – and, if needed, another tablespoon of milk.
  3. Sprinkle in cinnamon, to taste (you can go beyond the “dash” if you love the spice), and add however much additional Nutella and/or milk required to bring the mixture to a good spreading consistency, as “light” or as dense as you prefer.
  4. Spread on cupcakes. (An option which I did not take for this event would be to sprinkle chopped, toasted hazelnuts in the center of each frosted cupcake top – yummy!)

See—I told you it was easy!

Guest Blogger: Alice Orr and her “Sauce of Life”

I’m proud to introduce my first Guest Blogger to KitchenCauldron: Alice Orr, a writer friend I met many years ago, probably at my very first summer conference of the International Women’s Writing Guild, attended in 1995. Only in more recent years have Alice and I begun to connect on deeper levels, and our foodie interests seem to enhance that friendship. It’s only natural that my very first Guest Blog should be written by Alice.

Alice also gifts us with a bonus – a writing prompt following the recipe! Even if you don’t think of yourself as a writer (and I have to say that you’re wrong if you believe that’s the case because we’re all storytellers), her suggested tale-telling/memoir-writing exercise is Food for Thought. Which brings me to another innovation for KC: if you write something, perhaps you might like to share it with KC readers? That happens to be what KitchenCauldron’s “Food for Thought – Getting Literary” Page is all about (see righthand column). If you write a short piece from Alice’s prompt (preferably up to 500 words, but no longer than 700), you can submit it via e-mail it to me at wmnwords@nycap.rr.com and I’ll consider adding it to that page (or subsequent pages, if I decide to create a “Volume 2”). Hey—if there’s a recipe with it, maybe you too might become a KC Guest Blogger!

But back to Alice Orr.

I first realized that Alice was somewhat of a foodie while she was still living on Vashon Island, in the state of Washington. I can’t recall whether it was during her bout with cancer (mentioned below in her story-intro to the recipe) or just afterward, but I have a strong memory of an e-mail in which she bemoaned the fact that she couldn’t find any place in her area that made good meatballs; and she didn’t have a decent recipe for them either. Having moved to Washington from New York City years before, she was somewhat spoiled by the tasty convenience of many an authentic Italian restaurant within walking, subway or taxi range, including a few in formerly Italian-immigrant sections of the city. I know this is not the reason she and her husband once again reside in The Big Apple, but I’m sure it has to be the “icing on the cake” regarding their return to her home state and beloved NYC. Or should I say, “the meatball in the sauce”?

This recipe, however, isn’t about the meatball(s). It’s about where the meatballs usually wind up, in the sauce, although this version is marinara. Connected with the recipe are special childhood and other memories, including the source of the recipe – a hometown restaurant. Alice has made it her own, as most foodies do. She says, “I feel okay calling this Alice’s sauce because I have added my tweaks to the original. They are part of the story too. For example, I picked up the paste sauté trick from an actor named Charlie a long time ago. It adds a depth of flavor and aroma that makes me and my kitchen smile.” She advises reader-cooks to “Feel free to add your tweaks – and your stories – also. Stories make kitchen life as rich as this sauce and then some. So be sure to spin your yarns as you stir your pots.”

Without further ado (and saving Alice Orr’s short “bio” for the end of the blog), please enjoy – and hopefully cook up – a  potful of…

The Sauce of Life
by Alice Orr

I dedicate this to my Grandma – Alice Jane Rowland Boudiette – because she gave me my first Warm Kitchen Memories.

Grandma cooked on a cast iron stove so massive it had to be cut apart with a blowtorch to get it out of her house after she passed away when I was seven years and three days old. A circle of heat radiated around that stove the same way a circle of tranquility radiated around my grandmother. I basked in both through many frigid Northern New York winter days.

I would sit at the small wooden table between the kitchen window and the door to the storm porch at the back of Grandma’s house on West Main Street in Watertown NY. The storm porch was where I stopped to knock the frequent blizzards off my buckled rubber boots before going inside. It was lined with cupboards stocked to overflowing during August canning season with Mason jars of peaches and pears – corn and tomatoes – jams and jellies – chili sauce and pickles.

To be honest I do not remember Grandma’s cooking anywhere near as clearly as I remember what it felt like to be with her. Not just safe and accepted but at the center of the essence of safety and acceptance where I was simply Ali Bette, and that was plenty enough to be. I have no doubt that the reason I find calmness in cooking and peace in preparing meals hearkens back to the heart of my Grandma, at the heart of her house, which was always her warm kitchen.

Twenty-some years after Grandma was gone, I inhabited another warm kitchen. I had been married by then and had become a mom, only to be unmarried again and become a single mom. My friend Gayle was in the same boat and our boat was floundering financially. We shared a house and pooled our resources, but that pool was pretty shallow and our grocery budget suffered accordingly.

We had a big battered cooking pot with a lid that bounced to a clattery rhythm when the contents boiled. This pot was residence for the three main staples of our diet – potatoes for mashing, macaroni for cheese and spaghetti for sauce. Our kitchen on Moffett Street, also in Watertown, had its own small table near the window. The top was covered in off-white Formica with a pattern of gray wavy lines.

Our kids sat there every morning before school, each with a different brand of breakfast cereal in their bowls. They ate fast and slopped cereal and milk onto the tabletop. Gayle and I were also hurrying to make it to work and had little time for cleanup. We came home most nights to a mosaic of cereal flakes and shapes glued so tight to the Formica that they had to be soaked in soapy water, then pried loose with a spatula before supper could be served.

The greatest gift Gayle and I gave our children and each other back then was our ability to laugh amidst the hurrying and our lack of money and, of course, the mess on the tabletop. That laughter is at the heart of my Warm Kitchen Memories from that time when the hands-down kids’ favorite among our battered pot meals was Spaghetti with Sauce.

One particular Italian restaurant in Watertown was renowned for its sauce. Canali’s sat oddly off the main road which rose above it as an overpass. My family could not afford to go out to eat much when I was young. Cooking and eating happened at home. The same situation prevailed for Gayle and me. When I finally did get to Canali’s for a meal, their Spaghetti with Meatballs embedded itself in my taste memory forever. The sauce especially took my taste buds by surprise – subtle and full-flavored, with just the right amount of garlic.

Alice's former home on Vashon Island

I had never experienced sauce like that before and would not again until Cousin Robin reappeared in my life. We hadn’t seen each other since we were kids in Watertown. He was a towhead back then, a few years older than I with a big personality like so many of us in the Boudiette clan. His presence had not shrunk when my bout with cancer brought him to my house in Washington State a couple of years ago.

His robust frame filled our large dark green chair near the living room window. I languished nearby on my couch-turned-recuperation-bed. I could tell he loved to talk and let him do that. Robin is a raconteur with a memory for detail. His stories of our family washed over and through me as I drifted on the pleasant flow of his Texas-Oklahoma transplant drawl. Then he said two sentences that brought me to full attention.

“Do you remember Canali’s Restaurant in Watertown? I have their sauce recipe.”

He went on to unwind a tale of wheedling the recipe out of a chef there. I can easily imagine Robin wheedling anything out of anybody. On the other hand, he is a yarnspinner and I understand that the facts of a yarn are often embellished in the spinning. Nonetheless I was happy when a few weeks later he e-mailed me the recipe. I was amazed by the simplicity of the ingredients and cooking method, but the preponderance of canned components made me skeptical about Cousin Robin’s claims. I needed to test this out.

Vashon Island kitchen

I was feeling better by then – well on my way to the positive verdict my oncologist would soon bestow on me. I was ready to return to the warm circle of my own kitchen at the heart of our yellow farmhouse at the heart of Vashon Island. I was also eager to feel the reassurance I knew I would find there, where my wooden spoons – worn smooth by years of mixing – waited for me to pick them up again and mix some more.

I did not yet have the strength for anything requiring lengthy preparation. Cousin Robin’s recipe would be perfect and the ingredients were so basic I had them on hand. I pulled out my favorite sauce pot – a flame red Le Creuset with stove stains on the bottom – and began opening cans. Soon after, I was stirring with my long-handled wooden spoon while rich aroma wafted through the house that must have missed the comfort smell of cooking as much as I did.

I held off on the tasting. I looked forward to a happy surprise and dreaded disappointment at the same time. Finally I gave the thick darkish red sauce one more stir scraping in all of the bits from the bottom. Then I lifted the spoon to my lips. My taste buds leapt with delight just as they had back in Watertown at a booth in Canali’s Restaurant many years before.

Memory and longing collided in that moment at the very center of my being – from Grandma through Gayle to my Vashon Island kitchen – and I was profoundly grateful to be alive and present for the collision. Plus this was the best sauce I had ever made in my life.

ALICE’S SAUCE OF LIFE
Yields one large pot of marinara sauce

Ingredients

  • 1 to 2 tablespoons extra virgin olive oil
  • 1 to 2 teaspoons of minced garlic (from a jar is fine)
  • Two 6-ounce cans tomato paste
  • Two 15-ounce cans diced tomatoes
  • One 23.5 or 26.5-ounce can or jar of meatless spaghetti sauce, preferably tomato-basil
  • 2 tomato paste cans of water
  • 1 to 2 teaspoons sugar
  • 1 medium size bay leaf
  • 1 teaspoon salt. (Kosher salt tastes best but is bad for the blood pressure, so I don’t use it.)
  • Sprinkles of cayenne pepper, to taste
  • Sprinkles of allspice, not more than ¼ teaspoon
  • Black pepper, to taste
  • Fresh parsley and chives, snipped into the pan (optional)

Process

  1. Heat olive oil to sizzling in bottom of sauce pan. Add garlic and stir until aroma begins to escape.
  2. Add tomato paste to pan, blend into oil and garlic and stir constantly until paste begins to brown and smells delectable.
  3. Add the rest of the ingredients and blend together well.
  4. Bring to a boil. Cover and reduce heat until the sauce is simmering at a comfortable bubble.
  5. Simmer for two hours, stirring every fifteen minutes. Be careful not to let the sauce stick to the bottom of the pan. Lower the heat and stir more frequently if that begins to happen.
  6. Allow sauce to sit for a while or refrigerate overnight before serving so the flavors can come into true harmony with one another. Or – if you are in a huge hurry – serve it straight off. It will be delicious any way your time may dictate.

An Exercise for the Storyteller in You

Warm up as spring approaches by writing about an experience we have all had in some form or other. In my writing workshops, I do not usually specify what the mood of a piece should be. But this time I am going to ask you to make the mood of what you write WARM.

Write your own Warm Kitchen Memory scene. Something that has happened to you at some time in your life in a kitchen. Something you remember with warmth and fondness.

Do your best to make this scene come alive. The people who were there. What was said. What was done. And especially the feelings. Your feelings as you experienced this scene.

The first scene that comes to your mind and memory is probably the best one to write. It can come from your past or from this morning. There are no right or wrong choices.

Start by calming and centering yourself with some long deep breaths. Then – just write. Do not worry about how you write – just write – from the center of yourself and that Warm Kitchen.

If you have any questions about how to do this or if you would like to share the results please do not hesitate to email me at aliceorrseminars@gmail.com.

In the meantime – Keep on Stirring Pots and Spinning Yarns, Whatever May Occur.

Alice Orr has spent her career life as a publishing professional –
literary agent, book editor, published author.
In her workshops she teaches writers
how to give their writing work and their writer selves agent-editor appeal.
At her blog http://publishingsensefromaliceorr.blogspot.com,
Alice shares practical tips and pragmatic advice for writers
who want to be published or better published.
At her website http://www.aliceorrseminars.net/, she shares herself.

ALMOST-IRISH STEW for the Slow-Cooker, with SHAMROCK IRISH SODA BREAD

This year’s St. Patrick’s Day dawned sunny and warm. We’ve been breaking records this March with temperatures reaching into the high 60s and low 70s. That continuing trend, into yesterday, made for a huge turnout for Albany’s annual St. Pat’s Day parade – an event which we missed but were well-informed about by my Aunt Pat later in the day (the crowd, we were advised, was 8-to-10-deep along the parade route).

After my spending a good deal of the day writing for and posting to KitchenCauldron (the latter with some difficulty – for some reason, WordPress wasn’t taking some pictures), and Bill’s working on staining some furniture to go with the new hardwood floor he installed in Adrian’s room, the hubby popped his head into my office and asked, “Were you going to get outside today, go anywhere?”

“You suggesting something?” I asked.

“Well, I passed Kurver’s yesterday and it looked like it’s open.” Kurver’s Kreme happens to be my favorite spot for soft ice cream. Especially when it’s vanilla twisted with some sort of sherbert that I love (orange, watermelon, raspberry…). Besides, I consider the re-opening of Kurver’s each spring to be the first sign of spring’s return!

My answer: “YES!”

I had lamb in the fridge that had been thawing for Irish Stew, which I planned to make on St. Patrick’s Day the “regular” way (sans slow-cooker). If we went out somewhere, it wasn’t likely I was going to start cooking upon returning home at, say, five or six o’clock with a target of eating dinner at around 9 p.m. (and dishes not done ’til close to midnight). Luckily, there was a solution to this quandary.

“How about we head over to the North Albany American Legion Post, where Aunt Pat told me she’d be going after riding in the parade? Open to the public – and corned beef and cabbage at a really reasonable price!” I knew my aunt would be thrilled to see us turn up, and she was. We also got to meet two of her nieces from her Irish clan, as well as a nephew and his wife.

The corned beef and cabbage dinner was superb. Meat done so well it was falling apart. Cabbage and potatoes perfectly tender, and delish when topped with butter and pepper. And then off to Kurver’s for dessert (we both went for the vanilla-pistachio twist on a cone).

Marilyn & Bill, 35th anniversary, reading "re-commitment vows" to each other.

Now I should mention that St. Patrick’s Day is a sort of anniversary for my husband and me. Or maybe I shouldn’t, but I am mentioning it anyway. Our 40th wedding anniversary is at the end of next month, but this one dates back a few years before we married. Not exactly a fairy tale though.

Once upon a time, in a city eked out by the Dutch but home to myriad immigrant groups in the years since colonial times, a young Irish-American man went out merry-making on St. Patrick’s Day. The green-eyed, curly-haired twenty-something visited several establishments at which the Wearing o’ the Green was being celebrated on that day (and into the night and wee hours of the morning), indulging perhaps in corned beef and cabbage and soda bread, and definitely in plenty of green beer. He himself proudly sported a lovely green-tinted carnation boutonniere – but anyone would’ve known he owned an Irish heritage without such a token sign of the Green Isle. You only had to glance at the pale skin, the freckles and that slightly pug nose. He might as well have had the map of Ireland tattooed on his forehead.

Not far from the young man’s St. Pat’s Day rovings, a young woman of his acquaintance had pretty much settled into a quiet evening in the apartment she shared with one other woman. She wasn’t Irish or Irish-American and, while she’d often celebrated the holiday over the years, she hadn’t “done the bars” for this year’s big day. Instead, she found herself reading a good book and retiring to bed reasonably early (considering that it was a very good book and she could hardly put it down).

The young not-Irish woman awoke an hour or two later, to the ringing of the doorbell. Now we’re talking the late ’60s, so most of us weren’t scared-out-of-our-wits to open the door without looking out a peephole or shouting down from a window to determine who dared show up at such an ungodly hour. This is what she did, just went downstairs to answer the ring. And found the green-eyed, green-boutonniered guy at her doorstep.

It happened that this young lady, of mixed immigrant stock (some of the Dutch; a little German and Russian; and more recently on the paternal side, Polish), already had a wicked crush on the inebriated Irish-American who had just appeared at her apartment. She welcomed him into her place. They talked for a while. He left the next morning, most likely hung over, leaving the green carnation with the sleepy-eyed girl.

The gods of their childhood religion did not send lightning bolts down upon the young man, nor on the young woman either. Neither of them believed they were doomed to an inferno. It was, after all, the ’60s. They were not hippies but they still listened to the voices of their generation. OK, no lightning bolts, but one of The Gods of Albany’s Streets had managed to leave a parking ticket on the poor guy’s car before he stumbled out into the sunlight on the day after St. Paddy’s Day.

And they didn’t live happily ever after either. It was touch and go for a few years. Three, if you must know. After which they made a pretty nice life together, having two anniversaries to celebrate each year.

+++++

What can follow such a tale? I guess it just has to be about the recipes – so here are a few notes about the two recipe in this post (a double-header, if you’re into baseball terminology!). And then will come the how-to if you’re interested in trying them yourself.

My Irish Stew originated out of an old cookbook that I still hold onto because it’s been good to me. It’s called The Frugal Gourmet on Our Immigrant Ancestors: Recipes you should have gotten from your grandmother, by Jeff Smith (William Morrow and Company, Inc., 1990). I also have two other cookbooks by Smith – his original one and a book on Italian cooking. From just The Irish Immigrants chapter of Our Immigrant Ancestors alone, I’ve made the Lamb Stew (the original source for this recipe) plus Colcannon and Dublin Coddle. (Unfortunately, I can’t ever pick up one of his books without recalling the big scandal that befell him later in his career, with charges that he was a pedophile. But that’s nothing to do with the fact that he was a food genius.) I changed my basic stovetop recipe slightly from the Frugal Gourmet’s, but this slowcooker version is considerably different. Here’s how:

  • First off, I used less lamb. Also, as it turned out this (first) time around with the slowcooker recipe, the lamb I had defrosted for the stew was not the already-cut-for-stew version. Two of the three packages were chops, with bones, so I found myself taking time to cut the meat away. (Not to waste those good bones, I put them in a sauce pan with some onion, carrot, garlic and water and boiled them down to make some lamb stock.)
  • Next change: the Gourmet’s recipe calls for “thickly sliced bacon.” I went for Canadian style bacon instead this time, cutting the fat a bit. (Great decision, it turns out – tasted much the same, which is to say, “Great!” If you decide you’d like to opt for the “regular” bacon, then you’d be better off frying the bacon first and then browning the lamb in bacon fat – in which case, you probably won’t need the oil and butter).
  • Jeff Smith deglazed his frying pan with ½ cup water. I used some of the beef stock, while the Canadian bacon and garlic were still in the pan.
  • I also used less beef stock overall, since moisture in a slowcooker is completely retained. I didn’t want to waterlog the whole stew, so to speak.
  • I cut the sugar in half.
  • I added a twig of dried rosemary (figuring it would go well not only with lamb, but also with thyme).
  • I never cook with wine or alcohol of any kind, and the Frugal Gourmet did not offer another option (and didn’t say the wine was optional either). I substituted with extra beef stock – ½ cup.
  • Incidentally, the cookbook calls it Lamb Stew. I used to call it Irish Stew, but the Irish Stew we once ingested that was cooked by an honest-to-god Irishman (our landlord over three decades ago) was quite bland, as I think the authentic stuff tends to be. So I’ve renamed it Almost-Irish Stew. With bacon in it, along with a couple spices no poverty-stricken Irishman “back in the day” would’ve been able to afford (and might not have even heard of), it’s more like a concoction contrived after that poor Irishman had discovered the leprechaun and his pot o’ gold at the end of the rainbow!

As for the Soda Bread, that recipe came from a woman I worked with during the six looonnng years I spent as a Sr. Personnel Administrator with the New York State Department of Social Services. I wasn’t crazy about the work atmosphere, but I did meet some good people and I do have to say I organized some great holiday bring-a-dish lunchtime parties. I think a St. Patrick’s Day one was the first of them. Many a good recipe came home with me from those events. I have no idea where the “Shamrock” portion of the Soda Bread’s title came from, but it sounds festive. Only three changes to that original recipe:

  • I didn’t use only raisins for the fruit. Cut-up dried apricots, I decided, would add color and a little bit of sweetness to the bread.
  • I soaked the fruit before adding it to the mixture – not just in water. A bit of apple cider sounded good to me!
  • The recipe below simply gives “buttermilk” as an ingredient. I didn’t have fresh buttermilk in the refrigerator. The last “leftover” buttermilk had been tossed out a few days before, about 2 weeks past its supposed expiration date. I do keep what’s called “cultured buttermilk blend” by SACO in our fridge. SACO’s instructions say to mix their powder with the dry ingredients and then add their directed amount of water (according to how much buttermilk is required for the recipe) with the liquid ingredients. I figured it would be even richer if I used milk instead of water. In fact, we stock only 1% or 2% milk, so I included a little bit of light cream in part of the liquid.

And now on to the recipes for tonight’s dinner. No green carnations adorned the table (although Bill did look for some at the market earlier in the day). Just a couple plastic shamrocks. But the meal was oh-so-good!

ALMOST-IRISH STEW, converted to slow-cooker status
Yields enough stew to serve at least 6 to 8,
perhaps with leftovers (which taste even better than Day 1!)

Ingredients

  • 3 to 4 lbs. boneless lamb (possibly lamb shoulder), cut into ½ to 2 inch pieces
  • 1 teaspoon table salt or fine sea salt
  • ½ teaspoon of fresh ground pepper (or to taste)
  • ½ cup all-purpose flour
  • 2 tablespoons olive or canola oil (possibly more, as needed)
  • 1 tablespoon butter (ditto to above, maybe more)
  • 4 to 5 carrots, peeled and cut into 1 to 1½” pieces
  • 2 large onions, peeled & quartered, somewhat pulled apart by layers
  • 6 or 7 potatoes, peeled & quartered (should be fairly uniform in size
  • 8 to 10 round slabs of Canadian Bacon (or use regular bacon, but see note above re changes I made to recipe) – cut into small pieces (or into strips, if you prefer)
  • 2 cloves garlic, peeled & finely chopped
  • 2 to 2½ cups Beef Stock
  • 1 teaspoon sugar
  • 1 teaspoon dried thyme
  • 1 bay leaf
  • a sprig of fresh or dried rosemary
  • ½ cup of dry white wine, or substitute additional beef stock
  • additional salt & pepper, to taste
  • Chopped parsley to garnish (optional)

Process

  1. Position your slow-cooker, or crockpot (or however you refer to it), on the counter or table near where you will be prepping your stew ingredients. Ideally, it’s also where you’ll be plugging it in to cook – but then one’s kitchen is not usually set up to accommodate every single adventure into cooking or baking! Take the cover off and set aside, so it’s ready to receive the ingredients as you prep them.
  2. Ensure your cut-up lamb is of uniform size so that they will cook evenly.
  3. In a large zip-lock plastic bag (or in a large mixing bowl), place the flour, salt and pepper. Shake it to blend.
  4. Add lamb chunks to bag, zip it up, and shake until they are coated with flour mixture.
  5. In a large frying pan (12”, if you have one), melt the butter in the oil over medium heat. Then add the flour-coated lamb to the pan, hopefully in one layer. Brown lamb over medium-to-medium-high heat until it’s got a little color (slow-cookers don’t brown meat). Do not cook all the way through. Do not put that pan into the dishpan after it’s browned enough, and do not toss out any drippings that might be left!
  6. While the lamb is browning, place carrots and potatoes in the bottom of the slow-cooker. Top with most of the onion (save a little to go atop the lamb, which will be the last layer).
  7. Scoop the lamb into the slow-cooker, distributing it evenly atop the vegetables. Sprinkle remaining onion atop.
  8. If needed, add a little more oil and/or butter to the frying pan. Then add the Canadian bacon, just leaving it to sauté for about a minute, so it can soak up more flavor. Add the garlic, stir and sauté for an additional minute.
  9. Add a little of the beef stock to the pan and stir, deglazing while bacon and garlic remain in pan.
  10. Distribute contents of the pan (bacon, garlic and stock) over the lamb.
  11. Sprinkle the sugar and thyme over top of the slow-cooker ingredients.
  12. Pour the remaining beef stock over everything.
  13. Tuck the bay leaf into the middle of the lamb mixture, pushed down a bit into the rest of the mixture.
  14. Place the rosemary sprig on top.
  15. Pour the wine, if using, or the extra beef stock over the mixture.
  16. Secure slow-cooker cover in place, set it for LOW cooking and expect it will take 7 to 8 HOURS at that temp. Make sure it’s plugged in too (yet another kitchen faux pas in Marilyn’s past!) You might check it at 7 or 7½ hours but be aware that, once you take the cover off a slow-cooker it means you’ll have to add 20 minutes to the remaining anticipated cooktime.
  17. When the stew is done to perfection, remove the bay leaf and the rosemary twig (if some of the leaves remain in the stew, it’s all to the good).
  18. Stir the mixture to re-distribute ingredients, then adjust seasoning if necessary (salt/pepper).
  19. Sprinkle with parsley (optional).
  20. Accompany with Irish Soda Bread, just for authenticity! OK, for deliciousness too. And, of course, I happen to have the best recipe ever for Soda Bread too…

SHAMROCK IRISH SODA BREAD
Yields one (1) “loaf” (baked in a 9” round cake pan)

Ingredients

  • 1 cup dark seedless raisins
  • ½ cup chopped dried apricots (optional; if not using, you might add a little extra raisins, if you like)
  • ½ cup apple cider (optional)
  • water, to cover raisins & apricots
  • 4 cups unbleached, unsifted all-purpose flour
  • 3 tablespooons sugar
  • 1 tablespoon caraway seeds
  • 4 teaspoons baking powder
  • 1 teaspoon table salt or fine sea salt
  • ½ teaspoon baking soda
  • 2 cups buttermilk (see note in narrative above for my substitution)
  • butter, melted (for drizzling top after baking – about 2 tablespoons)
  • sugar, for sprinkling top

Process

  1. Pre-heat the oven to 375 degrees Fahrenheit.
  2. Place raisins and apricots in a small, microwave-proof glass or ceramic bowl. Pour apple cider over the fruit. Add water enough to cover all the fruit. Microwave for about 1 ½ to 2 minutes, to heat the water to warm. Set aside to allow raisins and apricots to soak for at least 10 to 15 minutes.
  3. In a large bowl, mix the flour, sugar, caraway seeds, baking powder, salt and baking soda.
  4. Drain the raisins and apricots.
  5. Stir the fruit into the flour mix, ensuring it distributes well.
  6. Pour the buttermilk into the mixture and mix with a fork until the dough is formed, with no bits of dusty flour hiding beneath the dough.
  7. Bake in either a 9” x 9” square pan or a 9” round cake pan for 40 to 45 minutes, until a cake tester or knife slipped into its center comes out clean.
  8. Drizzle melted butter over the entire bread.
  9. Sprinkle lightly with granulated sugar (or raw sugar, if you choose).
  10. Cool for about 15 minutes before removing from pan to serving platter.
  11. Serve warm or save for later!


“MEN LOVE THIS,” LAURA SAID: ROASTED ITALIAN SAUSAGES & VEGETABLES; plus, what to do with the leftovers…

For this blogpost, I’m heading right for the food-witchy stuff – but not like you’d think. I’m not getting into the symbolism, at least not right away. I wanted to honor a special woman, a dear friend and former co-worker who’s always with me even though she passed away years ago. She was a “foodie” before the term was fashionable in this country. And what has this to do with witchy-ness? Well, as I was contemplating how to introduce the recipe, I remembered that I’d written the following short essay a couple years ago, although I couldn’t have told you the specifics of its content before re-visiting it today…  and, wow, this was before KitchenCauldron was even a flash in my brain:

**********

Laura

     “My kids say I must be a witch.” My dark-haired coworker grinned at me as we enjoyed a rare lunch away from the office. I already knew this would take some time because Laura Kurner was the slowest diner with whom I’d ever noshed. She savored every bite, often listing aloud ingredients detected in a particularly delicious dish. Now it sounded like some intriguing talk could delay us further.

     “Why is that?” I asked, expecting to hear about rebellious reactions to parental discipline.

     “Well, I seem to know things, they think, before other people do. Probably just women’s intuition.”

     It’s been over forty years since that conversation and well over two decades since cancer took my friend from this earth, yet I still ponder its content. I’ve come to believe that, at least for me, Laura’s witchy aura translates into a metaphor of a cauldron: cauldron equals cookware, and everything connected with kitchen activities.

     Laura and I sat across from each other at one of my first permanent state jobs – she, the widowed mother of three older children; me, the college dropout not sure where life would take me. Close to my mother’s age, she couldn’t be more different than Mom. This short-haired, big-hipped woman (“better for child-bearing” she boasted) possessed the most infectious laugh I’d ever heard, and I heard it often. But this wasn’t the only difference.

     Mom’s cooking was good basic stuff (she got raves over her creamy mashed potatoes and everyone loved Dolly’s rendition of her Polish mother-in-law’s stuffed cabbage). But Laura’s culinary craft felt magical to me. My mother’s repertoire of spices pretty much encompassed things like salt, pepper, chili powder, garlic salt, factory-mixed poultry seasoning and sometimes cinnamon and nutmeg. Laura, on the other hand, uttered exotic terms like tarragon, rosemary and cilantro. Since she was Italian, basil, oregano and olive oil also rated high on her list of essentials. “You have to try out the spices,” she’d tell me. “Taste them, let your tongue get acquainted.” Then, I was assured, I’d begin to know them, understand which ones enhanced which foods.

     One late fall afternoon Laura, another coworker and I were enjoying an after-work drink at a local piano bar half-a-block from my new apartment. Glancing out the window, I noticed two guys crossing Washington Avenue, headed toward The Lamp Post. “That’s Dave,” I said, pointing to the straight-haired one on the left, no-hipped with a slight swagger. Both Laura and Nancy knew I still had a crush on Dave, who’d dated me once or twice. “And the other guy, the curly-haired one with freckles, is Sam, real name Bill.” Sam and Dave were best friends.

     Staring out the window as the two approached, Laura squinted her eyes at these two young men she’d never met but had heard snippets about for months. Before they came through the front door, she turned to me and said, “Forget that Dave. He’s a little arrogant. Marry the other one. Sam.” She proceeded to tell me to invite him to dinner that night and dictated the entire menu: Italian sausage, peppers, onions, potatoes. “Men love this meal,” she instructed. “Wine is good,” she said, “but you probably don’t want to sleep with him this time. Let him wonder…”

     A couple years later, upon returning from our honeymoon, one of our first visits as a married couple to someone’s home was to Laura’s in Coxsackie, NY. While we chatted away about what we’d seen and done on Cape Cod and how the new apartment was shaping up, Laura created a scrumptious feast. Our spur-of-the-moment arrival didn’t phase her a bit. She pulled a small roast from the freezer and introduced us to the pressure cooker (this was before microwaves graced 95% of American kitchens). In what seemed like no time, we were chowing down and offering up compliment after compliment.

     I treasure the few recipes I have from Laura, although I’ve never had courage enough to try a pressure cooker. More important than actual recipes, however, was another gift. Her kitchen was a place of joy, of adventure. I will never be a gourmet chef or master baker but, thanks to Good Witch Laura, I know things. My newly renovated kitchen boasts a whole cabinet of spices, and I know how to use them. And if there’s one I’m not sure about adding, I consult my shelves of cookbooks… or I can taste them, get to know them intimately, add them to my cauldron of kitchen spells.
**********

Just last year, while reading a novel titled Feeding Christine by Barbara Chepaitis (Bantam Books, 2000), I learned about an Italian “Witch of the Epiphany” named La Befana – and of course I had to research her further. At the time, I was creating what I called “Goddess Journal Entries” and sharing them with several friends via e-mail. I knew Befana would show up as an entry because I was intrigued. The internet offered much info, including a site eminating from Abruzzo, Italy – where Befana is quite “real” to the children who might receive her gifts on the eve of the Epiphany in early January.

Through my searches, I discovered that artist/writer Tomie dePaola wrote a children’s book called The Legend of Old Befana (Voyager Books, Harcourt Inc., 1980), and I ordered it from Amazon.com (then I ordered a couple more, for the grandnieces for Christmas). In it, as La Befana finally gets ready to seek out the Christ child (having earlier turned down an invitation to travel with the Three Wise Men because she was too busy sweeping – according to other sources I found, she sweeps in the new year). She decides to bake cookies to take along as a gift for the new babe.

Of course there’s more to the story, but perhaps you’ll buy dePaola’s book or take it out of the library (under the pretense of wanting to read it to a child, of course). My point here is that the legend of Befana joins both Pagan and Christian traditions. In fact, in some places in Italy both Santa Claus and La Befana appear at the same festivals. And always there are cookies. But when he’s not “on the road” delivering gifts on December 24th, maybe Befana roasts him some sausages with vegetables, á la Laura Kurner, insisting that he partake of “What Men Love” before he turns to “What Everybody Loves,” which would be the sweets.

ROASTED ITALIAN SAUSAGE AND VEGETABLES, LAURA’S WAY
Serves 4 to 6 or, in our case, serves 2, with great leftovers for a couple days, a couple ways

Ingredients

  • 5 to 8 good Italian sausages, depending upon how many you think you’ll consume (I prefer sweet sausages, but the hot stuff might be your preference)
  • dried spices:
    1 tablespoon parsley
    1 tablespoon basil
    1 teaspoon oregano
    dash of salt (optional)
  • 3 to 4 medium potatoes, skins on, cut into chunks about 1½ to 2 inches in size, soaked in water for about 15-20 minutes (while you’re getting the other veggies prepped!)
  • 1 basket of baby bella mushrooms, about 20 to 25 small ’shrooms (you can use white button mushroom variety, but bellas have so much more flavor!)
  • 3 to 4 bell peppers, various colors (red, yellow, orange, green), seeded, cut into large chunks (each of my 3 peppers were cut into 3 section)
  • 3 to 4 medium carrots, peeled and cut into long pieces approximately the same in size
  • 2 large onions, skins removed, cut in half vertically, then each half cut into 3 large chunks
  • 1 zucchini, halved horizontally, then halved the other “horizontal” way as well; then cut each segment into lengths about 3 inches or so long.
  • olive oil: 1- 2 tablespoons to coat the pan; about 2 or 3 tablespoons to drizzle over vegetables before going into oven (I drizzle straight from the bottle)
  • 2 to 3 tablespoons fresh parsley, chopped (optional, but a plus)
  • 2 to 3 tablespoons fresh basil, chopped (optional, but a plus)

Process

  1. Pre-heat oven to 350 degrees Fahrenheit.
  2. Brush a small amount of olive oil over the entire inside-bottom of a large roasting pan.
  3. Place the sausage in the pan, spread apart to allow for vegetables to surround them.
  4. Add the dry spices and salt, if using it, to a large zip-lock plastic bag and shake them to mix.
  5. Drain water from potatoes and put them into the zip-lock bag, zipping it shut. Shake the potatoes until spices appear to have “stuck” to all chunks, at least to some degree.
  6. Distribute potatoes around the sausages in the roasting pan.
  7. Distribute peppers, carrots and onions throughout the roasting pan.
  8. At this point, you can choose to add the zucchini as well, although you have the option of waiting for about half-an-hour before doing so since they might soften beyond your taste preference if put in at the start of roasting time. (I add them at the beginning because I’m always afraid I’ll forget to put them in later!)
  9. Drizzle olive oil lightly over everything in the pan.
  10. If there’s any spice left in that zip-lock bag, top veggies with it. Then sprinkle the freshly chopped parsley and basil atop of it all.
  11. Roast until sausage is cooked thoroughly and fork pokes easily into potatoes. (This usually takes about an hour-and-a-quarter to an hour-and-a-half.)  A couple times during the process, open oven and stir sausage and vegetables around, to promote even cooking.
  12. Great served with applesauce on the side. And maybe Italian bread.

NEXT DAY:   Heat it up in the microwave, slicing sausage so it warms up thoroughly at about the same rate as the veggies.

DAY AFTER THAT (if there’s still some left):  We had no sausages left, but plenty of vegetables; so I decided to make a frittata with them (then figured I’d add some diced-up Polish ham too). Diced veggies up a bit smaller in some cases (like the potatoes), warmed them for about 10 minutes over medium heat in a large pan while prepping egg mixture. Beat up 6 eggs, adding dried parsley and a little pepper, as well as about a tablespoon of half-n-half. Poured it over warmed vegetables and let it cook for no more than a minute. Then put entire ovenproof pan into a PRE-HEATED (to 350 degrees) oven for about 15 minutes. Opened up oven, topped frittata with cheddar cheese slices, and closed oven for another minute or two – until cheese melted. Removed from oven and allowed to sit – while I took pictures! Served with sliced cantaloupe melon and blueberries, with a touch of raw sugar. And whatever “bread” on hand to toast (for us, I had one plain bagel and some rye). Incidentally, it tasted great with a little sour cream on top.

HOT DOG! Frankly, Any Dog with “The Works” Deserves this Meat Sauce!

My Aunt Naomi owned, at different times, at least two restaurants in Gloversville, NY decades ago. I don’t remember what the first one was called (any of my relatives recall?), but the second retained the name, I think, of the previous owner, Helen’s Lunch. I know it was located on Main Street, several blocks up from the downtown section. It was a big deal for me when I was old enough to walk it on my own from my Andrews’ relatives’ house. Probably the former name served well enough, since one of my aunt’s daughters was named Helen and she worked in the restaurant as well (along with her sisters, Snookie [Ruth] and Joan). There was no question that a big attractions at both eateries was Aunt Naomi’s hot dog sauce. People traveled from miles outside G-ville for those dogs, topped with mustard, onions and The Sauce – The Works!

My mother (Dolly) once told me that her sister learned how to make this meaty condiment from “an old Greek lady” but I’m not sure if the recipe was ever written down before I cornered Mom in my kitchen, in front of the stove, a note pad and pencil in my hands. My Aunt Naomi (the sister with whom she felt closest, despite a 13-year difference in ages) taught Mom how to cook up the sauce, and for years we enjoyed it whenever Dolly made a batch. Mom would whip up a potful for a picnic and bring along a couple small-portioned, frozen containers’ worth, so we could pull them out of the freezer at a later date for eager consumption. At one time, the stuff was even bottled for commercial sale, but it was the late 60s and opportunities for widespread advertisements weren’t as wide and diverse as they are now, what with Facebook, blogs, Twitter and more. It had a small, loyal, local following (my dad even sold it in his tiny, corner grocery store on Second Avenue in the South End of Albany), but it certainly didn’t earn my relatives a fortune. I think the enterprise came to a close when Aunt Naomi and Uncle Corley pulled up roots and moved to Arizona, where they remained for several years.

Uncle Corley, cousin Helen, Aunt Naomi, 1950s, in their restaurant

I picture Dolly standing beside Naomi in front of a stove in their more youthful times, pretty much the same as when I was wresting details of the recipe from my mother decades later. But I don’t think Mom would be writing anything down, unlike me, who grabbed her hand occasionally to stop her from dumping an ingredient in the pot – so I could measure it. My mother cooked by “feel” and experience, as many home cooks did and still do. She’d witnessed her sister’s cooking for years, having spent lots of her childhood and teen years in Gloversville at the Andrews home. In fact, her eldest niece by Aunt Naomi was only five years younger than she was – so in some ways, Naomi was a bit of a mother figure.

Mom's favorite picture of herself, at 16, outside Bleecker stadium in Albany (during World War 2).

All her later life, Mom fantasized about living in Gloversville, but it never happened. Still, at least one week of each summer was spent with Aunt Naomi and Uncle Corley, and I loved it. I loved the food: delicious, basic food to fill the tummy. I loved the company. And, for a kid, it felt special that my aunt ran a restaurant!

Whenever I pull together a “cauldron” full of Aunt Naomi’s Hot Dog Sauce, I tend to double the recipe that you’ll find below. Like Mom, I want to ensure there’s sauce for another time or two. Small portions freeze well, which is the way to go so you can boil, fry or grill up just a few frankfurters and not worry about whether or not you’ll use the rest up before it sits in the fridge too long (Bill says I should work for the FDA [federal Food and Drug Administration] since I take seriously all those warnings about how long one should hold on to leftovers!). While Bill could eat hot dogs several times a week (especially the all-beef variety), I cannot; ergo, the freezer strategy. All in all, I prefer those small portions because I think of hot dogs with this special sauce as a treat, not something included weekly in a balanced diet.

The reason I decided to give priority to creating a blogpost centered on this recipe, rather than the at-least-a-half-dozen other posts for which I’ve taken recent pictures, is because hubby Bill remarked to me last week, “I’m in the mood for hot dogs. How about it?” When I suggested that, if he waited just a few days, there could be some of this sauce to add to his mustard and onions, there was no question that I’d better get to it soon.

I made almost double this recipe but, unfortunately, discovered I didn’t have as much paprika as I’d thought. Checking the spice rack, I found almost a whole container of Smoked Paprika, which I subbed for close to half of the regular spice. Tasting it, I noted the difference and – to balance out to what I thought would be closer to my aunt’s sauce, or at least cover some of the “smoked” flavor – I then added about a tablespoon of garlic paste (from one of those tubes now available in the produce section of many large grocery stores). For me, this almost made up for the difference in taste resulting from the substitute. (I’m not a fan of smoked spices, but perhaps you’d like it better.) As for my husband, he thought it was great, true to what he’d tasted when Mom made it (he never got a chance to sample Aunt Naomi’s). Go figure.

I'm mashin' and choppin" away!

Something to remember: Mom always emphasized that the “secret” to this recipe was to keep mashing down the meat until it was fine in texture. She said this allowed the flavor of the spices to really soak in, for all the flavors to meld together. I’ve used a masher, but a metal spatula or chopper does the job best.


AUNT NAOMI’S/MOM’S HOT DOG SAUCE
Yield: enough to top a couple dozen franks, or probably more, depending upon how much you heap on!

Ingredients

  • 1 to 1½ lbs. ground beef
  • 1 small onion, minced
  • 1 tablespoon oil
  • ⅓ cup plus 1 tablespoon paprika
  • ¼ cup plus 1 tablespoon chili powder
  • water, to cover from start of cooking

Process

1.  Sauté onion in oil in a large saucepan until just turning translucent.

2.  Add ground beef and fry until browned, continuously mashing beef to break it down to a fine texture.

3.  Add paprika and chili powder, stirring in thoroughly.

4.  Add water to cover beef mixture and to about 1 inch above.

5.  Simmer sauce for 1 to 1½ hour, stirring occasionally, until most of the water is cooked away. (I continue to mash the beef up occasionally during this stage too.) If you prefer the sauce to be spicier, add a little more chili powder before simmering is finished.

6.  Serve on hot dogs in buns. (I prefer New England style buns, toasted on both sides.) Tastes especially good with mustard and, if you like them, chopped onions (I don’t do raw onions – migraine trigger!).

Bill goes for "The Works"!

7.  If you choose to freeze in small amounts, reheat later by adding a small amount of water to the pan with the frozen block of sauce. It’ll cook down/heat up well.

My choice: just the dog with the sauce and a little mustard both below and atop the dog