COMFORT PASTA (WITH RICOTTA, NUTMEG & PEAS) – QUICK & EASY!

Most pasta – no matter what kind or how prepared – qualifies as comfort food for me. The old standard Macaroni and Cheese ranks #1 in my book, probably because it was a my mother’s dish my mother often served. She tossed together canned, diced tomatoes and American processed cheese – plus elbow macaroni and whole milk (no one even hear of 1% or 2% milk back then, and skim was too skimpy). That’s about it, except for salt, pepper and maybe a little garlic salt if she had it. It was always delicious. I make a sort-of version of hers about once a month, although with different (and alternating) cheeses, but I often hunger for something a little different.

Uncle Champ (Frank), Aunt Mary with cousin Mary; circa 1950.

Then there was Aunt Mary’s spaghetti and meatballs. It was a super-treat to get invited to Aunt Mary and Uncle Champ’s house for the ultimate Italian dinner back-in-the-day. After all, Aunt Mary’s parents were Italian immigrants from Puglia — this was a genuine recipe! Her meatballs became forever the ultimate high standard against which all meatballs were measured, at least as far as Mom was concerned. When the family (my brothers and I and our families) took her out for her 70th birthday to a celebrated Italian restaurant in Albany, allegedy the place where former Governor Mario Cuomo preferred to eat when doing Italian, she naturally order spaghetti with meatballs. Asked how the meatballs were, she replied, “They were pretty good.” Not great. Just pretty good.

Decades ago, my cousin Mary gave me her mother’s recipe but I tend to go off on my own where these things are concerned, so I’ve only made it a few times. It requires cooking at least overnight, until a chicken breast literally dissolves in the tomato richness. And there’s more than just meatballs involved—sausage comes into it as well. A lengthy project. Still, it holds such an honored place in my personal history that it even worked its way into a poem I wrote some years ago, which just posted on this blog’s Food for Thought: Getting Literate page, for your reading pleasure.

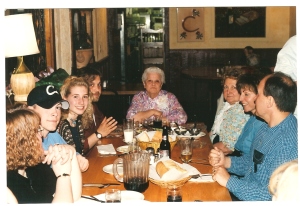
Dolly (Mom) out to dinner on 70th birthday, at head of table. 1997.

When Mom (Dolly) made spaghetti sauce it could be okay or it might be what I dubbed as her “cardboard sauce.” She’d give me a dirty look when I used that term, or would comment, “And how would you know what cardboard tastes like?” It was clear she was inferring that we ate pretty decently. Dad ran a tiny grocery store in the South End of Albany (he worked there for something like 14 years; later owned it –the business, not the building- for a few years before he became too disabled by a stroke to work). We often get leftovers where meats were concerned, the ones not sold to his customers, but there was always a decent roast on Sunday for dinner. And the Grand Union was less than a half-block away for items Dad didn’t sell or couldn’t tote home after work in a taxi.

In retrospect, I should’ve called that not-so-great sauce “Mom’s hurry-up” meal. Most likely, she just didn’t feel like cooking that night! Who wants to prepare an all-night affair, or even your own one-to-two-hour sauce, when there’s an easy way out- especially when you can get invited for The Real Deal and walk just a few blocks to consume it with lots of family?

Seems natural that I’d look for an easy-to-prep pasta dish for some of the homemade ricotta I’d made (see previous blogpost, dated October 4, 2012). I checked out a fav cookbook that’s been on my shelf for years, The Best 125 Meatless Pasta Dishes by Minday Toomay and Susann Geiskopf-Hadler (Prima Publishing, 1992), and found Ricotta with Nutmeg and Peas. Nutmeg being a favorite spice of mine, plus knowing it goes great with cheese of almost any kind, it was no contest about this selection.

The dish went over big with both Bill and Adrian. I loved it and will make it again. Of course, I made it my own with a few changes (which are noted) – the big one, of course, being that I used my homemade ricotta, made with whole milk.

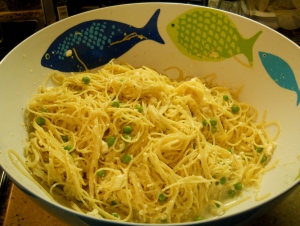
Comfort Past (with Ricotta, Nutmeg and Peas)
Yields 4-5 servings

Ingredient

  • 15 oz. homemade whole-milk ricotta (or store-bought part-skim), at room temperature
  • 4 tablespoon unsalted butter, at room temperature
    …with homemade ricotta!
  • 1 to 1 ½ cups peas (frozen or fresh – I used frozen)
  • ½ teaspoon nutmeg, freshly grated preferred (but ok to use jarred)
  • a dash of cinnamon (optional, my addition- not in original recipe)
  • ¼ teaspoon salt (I use sea salt, but table salt ok)
  • a few twists of the pepper grinder, to taste
  • ½ cup Parmesan cheese, finely grated
  • 12-14 ounces dried pasta (recipe said 12 ounces but I knew I could stretch it!; recipe also recommended small tubes or spirals but I used angel hair, our favorite, and it was great)
  • additional Parmesan and nutmeg, as needed and/or desired

Note: it’s important that ingredients be at room temperature, since nothing except the pasta will be heated!

Process

  1. Cook the pasta to al dente in a pot of several quarts of boiling water, adding the peas for the final two minutes. (In Italian, “al dente” means “to the tooth” which suggests that the tooth should meet a little resistance when it meets the noodle. The packaging for your pasta should give you guidelines for how long that particular pasta takes to make it to this stage.)
  2. Meanwhile, mash ricotta and butter in a large bowl, along with nutmeg, cinnamon (if using), salt and pepper.
  3. Set the bowl in warm spot on the stove while waiting for pasta and peas to cook.
  4. Drain the pasta and peas, allowing a bit of water to remain with the noodles and veggies.
  5. Toss the ricotta mix with the Parmesan in the warm bowl.
  6. Add the pasta and peas to bowl with ricotta/Parmesan mixture, and mix it all together using tongs or a forks.
  7. Serve (on warmed plates, if you like) sprinkled with additional Parmesan and a little nutmeg, if desired.

RICOTTA FROM SCRATCH – OR, LITTLE MISS MUFFET HAD NOTHIN’ ON ME (WHO KNEW MAKING RICOTTA MEANS SEPARATING CURDS & WHEY!?)

In yesterday’s post, I talked a bit about the From Scratch Club (http://fromscratchclub.com/) that I discovered while Bill and I wandered about Honest Weight Co-Op’s fall festival (http://www.hwfc.com/). Almost as soon as we got home from the harvest fest, I joined GoodReads (http://www.goodreads.com/), clicked “Groups” heading at the top of the page, found FSC Book Club, and clicked. Bingo! Just in time to participate in their second book challenge, The Homemade Pantry: 101 Foods You Can Stop Buying & Start Making by Alana Chernila (Clarkson Potter Publishers, imprint of Crown Publishing, division of Random House, 2012). Today’s blogpost is about my meeting the first challenge. In fact, blogging about it goes along with part of the assignment!

Participants in the FSC Book Club are challenged every other Monday to read a portion of The Book and then to complete at least one or two tasks. Always, they’re asked to make at least one of the recipes from the chapters, and then something else – such as inviting someone over to share your cooking/baking, or posting a picture of your product. On September 24th, we were directed (gently – there’s no pressure to do any of this) to read the first two chapters of Homemade Pantry (“Dairy” and “Cereals & Snacks”) and to make at least one recipe from either (or both) of them. In addition, we’re to take a photo of the finished product “in action.” We’re to upload pictures to the Group’s page and perhaps also to Facebook (Guess I’ll create a separate album for FSC food pics) and Twitter (not sure if I’ll bother with this one—I don’t Tweet very often). As I said yesterday, my choice was Ricotta from Chapter 1 (Dairy).

I putzed around for a few days with one excuse or another not to get to it. Good excuses: (1) not enough time in a solid block to concentrate on doing something so new (heaven forbid I should screw it up!); (2) had to get better equipment (after all, none of my bowls were deep enough to easily use my chinois [a/k/a huge, upside-down, cone-shaped, very fine sieve]); (3) thought I had all the ingredients but didn’t (oops! when I shopped, didn’t buy lemons – and then realized those two citrus fruits in the green bag in the frig were oranges).

When things settled down time-wise, and I’d bought a deep, wide-mouthed, glass canister, and a trip to the grocery included purchase of several lemons – well, it became clear that Excuse #4 was the one that truly held sway: despite the apparent ease of ricotta creation per the author’s recipe, I was nervous about attempting it. (I’m not Italian so how could I even think I can make this? Hell, growing up we never had ricotta in the house, I mean NEVER. My mother was in her 40s before she even tasted lasagna. And watching that temperature and timing it- OMG, I’ve owned one of those “attach-to-the-pot” thermometers for a few years and it had never been taken out of the package. Then too, why would I want to make it when I could buy decent ricotta?) So the only thing to do, finally, was to Just Do It.

It turned out heavenly. Once refrigerated, the texture (curds) was firmer, less creamy than the store-bought stuff but it tasted so much better. Just a hint of the lemon sneaks through when it hits the tongue (which made me wonder, once I went to the author’s blog to ferret out a link for folks to find Chernila’s recipe, about versions that use vinegar instead of fresh lemon juice). I saved the whey (liquid that dripped through the chinois) and used it in the pasta water for the Ricotta with Nutmeg and Peas that I made the same night and yesterday in the Lemon Ricotta Pancakes (topped with confectioners sugar and fresh, raw-sugared berries) we had for dessert. There’s still a little of the liquid left, which will go into a creamy soup tonight or tomorrow.

All in all, a terrific experience. Before posting the pictures (which will make up the remainder of this blog entry), here are links to author Alana Chernila’s two ricotta recipes: http://www.eatingfromthegroundup.com/2009/05/curds-and-whey/ and http://www.eatingfromthegroundup.com/2009/12/ricotta-again/. Her Homemade Pantry version indicates you could simply use a half-gallon of whole milk and fresh lemon juice, with the option of adding heavy cream and/or salt as well (I took both options). On her site, the “Ricotta, again” post comes closest to the book’s recipe (it lists both the cream and the salt, but not as options).

My batch made about 1½ cups of the stuff, as the author promised.

As the expression goes:  Try it – you’ll like it!

FALL HARVEST FESTIVALS BEGIN – AND I DISCOVER A GREAT FOODIE CLUB AT ONE OF THEM!

FALL HARVEST FESTIVALS BEGIN – AND I DISCOVER A GREAT FOODIE CLUB AT ONE OF THEM!

I know, I know – I was only taking the summer off from the computer (except for necessary e-mails, and I wasn’t very good about getting to them either), but it’s somehow already gotten to October. Well, I’m back but thought I’d readjust to the blogging thing with pictures from the Honest Weight Food Co-Op’s fall harvest festival (and this could be my only blog for at least for several days), which was held Sunday, September 23rd, and a couple snapshots from an event on Madison Avenue (also in Albany). It was at Honest Weight’s fest that I found a terrific resource, both local and online!

[NOTE that this blogpost was originally written about a week ago, drafted in MS Word, but when I attempted – several times – to complete it with pictures in the WP draft, big problems arose. Possibly with Gravatar, through which my photos get processed onto the blog, but perhaps ultimately with the fact that I have an old XP computer that WordPress doesn’t like any more because I can no longer download newer versions of my browser. Also, I can’t create links attached to words or phrases in the post, so I followed the phrases with the link, which is what I was doing before I knew how to streamline the process back when I first started the blog almost a year ago on 10/7/12. Looks like there’s a problem adding tags too. New computer needed but can’t afford it for a while. So I’ll “make do” with what I have, using the more time-consuming, roundabout way daughter Kristen figured out for me to add pics. She’ll be back to see if that can be improved upon!]

So, back to the festival…  Apparently this was the “fourth annual” harvest event by Honest Weight. Who knew? I just happened upon an item in the Albany Times Union ten days beforehand and told Bill I wanted to try to get to Washington Park ( http://www.albany.com/hotspot_washington-park.cfm) on that day, where everything happens around the Lakehouse. Sunday surfaced nice and sunny, a perfect day for an outdoor festival. Especially one that promised “more than 45 local growers, chefs, artisans and other vendors, plus family fun, prizes, and samples from the Chefs Consortium.” It was free too. Of course, one needed $$ in order to purchase some of the great stuff available.

One of the fun things for me: nostalgia. Washington Park is situated just blocks from where I grew up, in the heart of the city of Albany, NY. It’s where I played when I was kid, with parents escorting my brothers and me when younger and then on our own as we grew older.

Zembo cousins (some of us), probably late 60s, very early 60s. Marilyn (me) in front; back are, l. to r., Mary, Jim, Lynn.

When we urbanites wanted some green background for pictures (once color photographs became more popular, or maybe just more affordable), it’s where we went with our Kodak cameras to pose for snapshots commemorating such things as First Holy Communion days and Confirmations.

First Communions all happened close to Tulip Festival Time, so I posed (looking quite holy) in front of one of the beds of tulips in the park.

The Lakehouse, opened in 1876 (for some Park history, (http://www.washingtonparkconservancy.org/Park_History.htm), still goes strong- with numerous events, spring through fall ,and then there’s winter ice skating and the Holiday Lights in the Park, a month-long drive-thru activity beginning at Thanksgiving time. The best of them (or at least the most well-advertised and attended): the annual Albany Tulip Festival in May, which has grown into a huge event since my kid-days, and musicals and plays presented free to the public all summer long.

We don’t get into Albany all that often, although there’s plenty to attract our attention, but each time we do find ourselves in the city, the where-did-the-time-go feelings start up. I love the architecture (check out the virtual tour at http://www.albany.com/tours/washington-park/index.html?KeepThis=true&TB_iframe=true&height=500&width=1000, where you can see some of the buildings surrounding the park!) and the knowledge that I’m “home” (yes, you can go home again; it’s just that lots of it’s in your mind while you wander around what’s left of where you lived – so many changes, not all of them good). Yet Bill, who also grew up in this Dutch-settled area, and I never fail to remark to each other that it wouldn’t be bad living in this city again—except it’s noisier than the suburbs and, inevitably, the issue of parking emerges.

So, mostly in pictures, here’s the fall food festival – with few comments provided. You’ll have to read further to find out what that newly-discovered foodie club’s all about. You might even want to join online!

*****

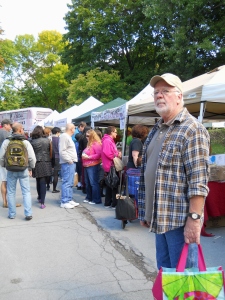
Once we found a parking spot along Madison Avenue, we walked around the edge of the lake to the starting point of the festival, where a hay and pumpkin set-up blocked the road off, marking Honest Weight’s temporary territory. (Yup, that’s me hold my bags – which are filled since the pic was actually snapped just before leaving.)

Two aisles to choose from, so we headed in the direction of the Lakehouse area first…
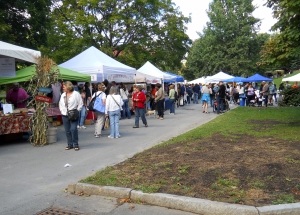
Which is where I found the FROM SCRATCH CLUB (FSC, at http://fromscratchclub.com/) table, in the tent outside the Lakehouse (enroute, stopping so Bill could get a cup of chili for lunch)….
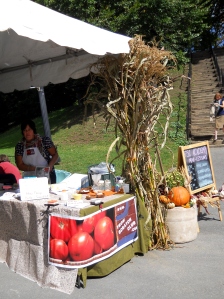
On their table, FSC had information about classes the group holds (dubbed “FSC Academy”), both in Ballston Spa and at the Arts Center of the Capital Region in Troy. They also hold “food swaps” of homemade items in various parts of the Capital District/Saratoga area.

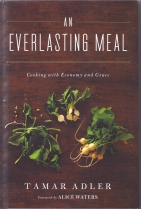
I noticed a book I love atop some papers, An Everlasting Meal by Tamar Adler (I wrote about its influence on me in a 5/25/12 blogpost titled “How to Get Rave Reviews: Start with Homemade Chicken [or Other] Stock” at https://kitchencauldron.wordpress.com/2012/05/26/how-to-get-rave-reviews-start-with-homemade-chicken-or-other-stock/). I commented to one of the women behind the table on how much I enjoyed that book, and she told me about FSC’s book club online at GoodReads (http://www.goodreads.com -you can join too- just look for book clubs). I took some flyers about the group. Adler’s book was their first read and they were about to start on The Homemade Pantry: 101 Foods You Can Stop Buying & Start Making by Alana Chernila (Crown Publishing Group, Random House, 2012). I already owned this one too and had read it this past spring. I decided I was going to check this out!

Hubby and I then wandered back the way we’d come, perusing fresh vegetables and homemade items on the opposite side of the aisle. At one booth, we bought two scones (which we devoured a couple days later) and two cinnamon-apple buns (Bill ate one right away; our son Adrian happily consumed the other the next day). Up the other lane of tents, angled around the hill in front of the Lakehouse, I found a stand of yummy-looking baked goods, from which I selected four huge cookies, two cranberry-chocolate chip plus two choc-chips with potato chips and pretzels. I managed to munch on one while walking around and the rest came home with us.

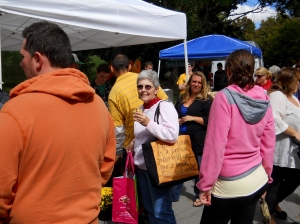
One of my favorite vendors from the Schenectady Green Market, The Pasta Factory, had taken the day off from that Electric City gig to participate in Honest Weight’s extravaganza. I bought ¾ pound of a multi-colored orzo that contains a note indicating there’s a bit of jalapeno in it (Bill & Ade will love that!), as well as ¾ pound of a mixture of various shapes and colors whose ingredients list included things like sweet potato and lime. The latter mix became an Italian-style casserole Tuesday might, created with good cheeses, sauce from scratch, and ground Italian sweet sausage – which went over BIG with the guys. (No, that recipe isn’t going to appear on this blog because I didn’t take any pictures!) That “sauce from scratch,” incidentally, included a dozen very orange, heirloom, plum tomatoes that called to me from another festival table, popping up from perches in a recycled egg carton!

We wandered around for at least an hour-and-a-half, loving the sights, sounds, aromas and weather.


No visit to Washington Park, at least not in the Lakehouse area, is complete for me without a visit to Moses (http://alloveralbany.com/archive/2011/04/18/the-moses-fountain-in-washington-park) . The monument, that is. Moses has been around the park since his unveiling in 1893. We played around Moses (and on Moses, when we could get away with it – a different definition, when I think of it, for “on the rocks”)  as kids, occasionally coming away with scrapes and cuts. The garden area encircling him is awesome. I especially love the blooms during our short tulip season in May – absolutely gorgeous. During this visit I even spoke with a woman who said she had also climbed the monument when she was a kid, although I think she said she lived on the other side of the park from where we resided. She’d recently returned from out-of-state to once again live in the area.

After a few minutes of rest on a park bench, we headed back toward the car, past the festive tents.

You’d think we’d had enough but we decided to stop by the Madison Avenue event, which was more like a block party than a harvest fest. I bought a great chocolate Halloween witch, etched in tinted chocolate atop a totally chocolate casket, which opened to reveal mini-chocolate pumpkins, skulls (white choc), and a black (dark choc) cat. All innards melted in my mouth within a day or so, and – with a little help from Adrian- you might say we terminated the casket. I also came away with a preserve from a woman who said she’s used it as a rub on pork, to the raves of dinner guests.

Best part of this stop, however, was that we ran into several friends, including Therese and hubby Frank, and another poet/writer friend (another Frank), and Anne Marie and Ed . Anne Marie’s White Pine Studio (http://www.etsy.com/shop/whitepinestudioamf) tent was pitched and selling. I brought home a pair of her handmade earrings and some of her notecards (had to get them—she’d painted the Snake Goddess picture years ago, at a time when we were on personal retreats at the same time at Still Point!).

Bill chatted with Ed for a while. Ed and I shared an office years ago, back when we both worked for NYS Division of Parole – on the very same block of Madison Avenue where this fest was happening! I think he even mentioned something about being back in his old neighborhood again as well… ah, nostalgia again (and his mom was with them too!).

I think Ed & Anne Marie might be posing right in front of the building (since remodeled) where Ed & I shared an office back in the mid-’90s. If it not, then it’s the place next-door.

We arrived home having loved the day and expecting to further enjoy it via our purchases. No fresh fruits and very few veggies were toted back to the homestead this time (the cupboard was far from bare in this department!), but we’re still lovin’ our purchased goodies. Plus, I joined GoodReads almost immediately, signed up for the FSC Book Club and have partially completed my first assignment from The Homemade Pantry. I made the Ricotta Cheese in Chapter 1 (Who’da thought I’d ever do that?!). Took pictures and will be posting them, blogging about it too. Maybe I’ll even go for Chapter 2’s Homemade Toaster Pastries. even though we were only “assigned” (no pressure to actually do it) to create one homemade goodie from either of the first two chapters.  Back in the day, I was always one of those nerds who’d go for the “extra-credit” assignment – although only for English or art class!

Another Foodie PenPal Revelation Day!

This month’s Foodie PenPal package arrived only a few days after the required mailing deadline (the 15th of the month is always the mail-by date), a gift from the Lone Star State, Texas. My FPP, Megan, decided – based on my answers to questions in her initial e-mail about any food allergies/sensitivities, likes/loves and dislikes – to go with a theme of “cinnamon.” Yay! Love cinnamon!

It was only my second time trying the the Foodie Penpal program, and again it was fun – all of it: picking out and sending items to my FPP in Minnesota, receiving my package from Texas, opening it to check out the surprises. I will, of course do this again – although I will wait a bit for my next experience. I’ll be back to blogging more, hopefully, within the next few days and will want to focus on that. Plenty of recipes waiting to write up and post…

For now, though, let me tell you about my August 2012 Foodie PenPal box.

My favorite thing, believe it or not, was such a simple – and simply tasty – bag of cinnamon sweet potato chips. I’ve been sampling them every now and then, but want to create some kind of simple semi-sweet dip to have with them before they’re all gone!

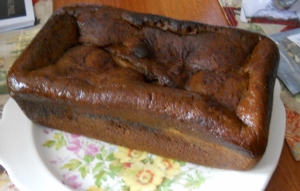
Megan also included homemade pumpkin bread. She used a recipe from a cookbook of family recipes she compiled for her cousin’s wedding, which reminded me of my own cookbook (recipes compiled for my brother Bill and his bride Deb in the mid-1990s). This particular recipe creates two loaves, she said, and so she retained one for her own family. Naturally, this now makes me want to bake up some of my own favorite rendition of pumpkin bread soon, especially since autumn is just around the corner.

 Next, there were packages of teas and coffee from a place called Independence Coffee Company. Megan mentioned in her note that this is one of her favorite “local” roasters. It’s located about 45 minutes west of Houston. She even thought to include one if those tea steepers (you know- that you fill with loose tea for steeping in hot water! I own a couple, but do you think I’d ever remember their true name?), a really nice touch.

She couldn’t resist adding a box of Hot Tamales, a fiery cinnamon candy, plus cinnamon-flavored Trident gum – finishing off the theme. She also packed an issue of Texas Monthly into the package, with a bookmarked article in it re Tex-Mex food by Hugo Ortega, who owns a restaurant locally. Very cool to include a regional magazine! 

If you’re interested in participating in the Foodie PenPals program, check out it out at the Lean Green Bean site page for it (hyperlink found in this sentence!). You don’t have to participate every month either. Each time you choose to, you simply re-apply (a simple form to fill out). If you do, hope you enjoy it as much as I have.

Foodie Penpal – Revelation Day

I haven’t been writing much, nor posting to blog or even much anywhere else. Guess I’ll call it summer vacation, although I’ve been simplifying in general (like cutting back on computer use, unsubscribing to lots of e-lists, etc.). Mostly it’s been reading and trying to stay out of seasonal (& sometimes ultra-seasonal) summer heat. Of course I’m cooking (a necessity), so there will be posts eventually, certainly by summer’s end. But I did sign up for the Foodie Penpal program (see icon on this page, which should take you to info about it), and a requirement is that you post on your blog, if you have one, about the package you received. So here goes.

My package came from a lovely-sounding teacher named Kacey who told me she lives in a rural town in the heart of Virginia. When she contacted me in early July, she said it had been over 101 degrees there for the entire past week. She said it was also her first time doing the Foodie Penpal thing, and she was looking forward to it. She inquired about any allergies or food restrictions, as well as food and dislikes, and the subsequent package reflected some of what I told her.

Kacey did something similar to what I’d decided upon – she went local for Foodie PPs. Everything in the box I received came from a Mennonite store, which I thought was neat. I’d told her I liked raspberries, and there were raspberry-yogurt-covered pretzels (which immediately had to be placed in the fridge because the box was so warm from mail transport in the heat that the coating was melting!). I said I loved cinnamon, so there were a couple homemade (by Mennonites) snickerdoodles. Another berry fav, blackberries, showed up as a jam (yesterday, I had it on toasted potato bread for breakfast). And then there was the delicious zucchini bread – which served as breakfast the day after received.

A wonderful first experience. I’ve already thanked Kacey for her generosity and care (but hope she reads it here once more); and I’ve heard from Teresa, my sending-TO foodie penpal in Maryland, who enjoyed her package as well. Kacey doesn’t have a blog, but I’ll check out Teresa’s later on in the day.

While I probably can’t do this every month ($$-wise), I did sign up for August and will remain on the list for participation at different times. What a great idea this project was – and how quickly it seems to have caught on! Already, Lindsay Livingston of The Lean Green Bean foodblog has over 1,000 people participating. Thanks go out to her for all her creative work.

NOURISHMENT FOR WOMAN’S SOUL: WHITE BEAN SOUP & CREATIVITY

Well, maybe not just a woman’s soul. I first concocted this soup for Bill & me (but then I have to say my hubby is an “honorary” WomanWorder, given all his support for my work/play with women writers over the years, which I think indicates he balances his masculine and feminine energies pretty well). In fact, the food-pictures in this post were taken back then – and not the same day it was made either, but of a microwave-warmed, next-day portion. I made it again for the WomanWords workshop at Still Point last weekend, on June 2nd. It turned out to be perfect “soup weather” since it was in the 60s, and the predicted shower or two passed through during our day of creativity, remembrance and honoring of connections to-and-through the International Women’s Writing Guild.

Over the last several years, I’ve pondered creating my own version of Tuscan white bean soup. It looked and sounded so soothing! I clipped copies of white bean soup recipes from magazines, stuck tiny post-it notes onto cookbook pages with potential source-recipes, and created a mental file of possibilities somewhere in the mush of my aging brain. It was perhaps six or seven weeks ago that I finally attempted it, with delish success, although I’m not sure how Tuscan it turned out to be. Perhaps its T-factor exists in my desire to conjure up a batch of soup with simple ingredients and an easy process. You know – rustic. Or in the types of beans… or the use of garlic and parsley (so Italian)… or maybe it doesn’t matter. It just IS. 

The first version that Bill and I enjoyed back in mid-April, a bit of Eden on the tongue (minus the forbidden fruit, plus the paradise), passed our lips thick-textured and full of flavor. A few days before the workshop, the potful I wound up freezing to bring to Still Point also was thick and rich, with an added herb (marjoram) and some pre-cooked chicken that were not ingredients in the first round! Packing the large cooler for my weekend (I had opted to bring my own food for the extra days I’d registered to stay in my little cabin), I also included a small container of homemade chicken stock to add to the soup while it simmered during the morning portion of our daylong session. I planned to use SP’s slowcooker for warm-up. Unfortunately the ceramic portion of that appliance was partially cracked, which meant “not such a good idea.” The alternative, using the stovetop, almost resulted in burning the soup as it simmered while we participated in storytelling in the other room in Welcoming House. It was sticking to the pan when I finally got out to the kitchen to stir again! Adding a bit more liquid helped, although it thinned the soup out.

Mandala window, Welcoming House, Still Point

None of the above hindered consumption, however, since every bit of the white bean soup disappeared before lunchtime was over and we returned to the room with the mandala-shaped window, to write and share our stories. We needed it, this group of women writers, because we were together for a purpose. A “heart-y” soup is good for the creative  soul.

HEALING-THE-HEART-AND-SOUL WHITE BEAN SOUP
Yields between 6 to 10 servings, depending upon amount of liquid added & if cook chooses to add additional beans and/or chicken.

Ingredients

  • 2 tablespoons olive or canola oil
  • 1 teaspoon butter
  • 2 to 3 medium carrots, peeled and chopped
  • 1 medium onion, peeled and chopped
  • 2 to 3 celery stalks (with leaves, if they’re also attached), peeled and chopped
  • 3 garlic cloves, peeled and diced
  • 4 to 5 cups chicken stock (homemade preferred; if not, then try to purchase low or no sodium stock) – possibly a little more, if needed
  • 1 cup water
  • 4 medium potatoes, peeled, chopped
  • 3 15-ounce cans cannellini or great northern beans (cannellini preferred; a combo is good too)
  • 1 small can garbanzo (chickpea) beans (optional)
  • 2 sprigs dried rosemary springs (perhaps 1 tablespoons’ worth)
  • 1 teaspoon dried thyme (or equivalent in sprigs of dried thyme)
  • 1 to 2 tablespoons chopped parsley (or 1 tablespoon dried parsley)
  • 1 teaspoon marjoram (optional – I added this to the batch made for the workshop & loved it)
  • 1 to 1½ cups cooked chicken, chopped up small (perhaps ½ inch) – this is optional; I added the chicken the second time I made the soup.
  • Salt
  • Pepper
  • Optional stir-ins and/or toppings: Light or heavy cream – a small amount to stir in if some dairy richness is desired; Greek yogurt or sour cream – a dab as topping; chopped fresh or dried parsley – a sprinkle atop; choice of croutons as topping.

Process

  1. In a large stockpot, sauté the carrots, onion and celery in the oil and butter for about 3 minutes, stirring occasionally. Lightly season with salt and pepper after about a minute.
  2. Add the garlic and continue to sauté for about another minute, being careful not to burn it.
  3. Add the chicken stock and water. Bring to a boil.
  4. Add potatoes and return to a boil. Simmer 15 to 20 minutes, until potatoes are fork-tender.
  5. Add beans, rosemary, thyme, parsley and marjoram (if using). Simmer another 10 to 15 minutes.
  6. Remove pot from stove. Removed herb sprigs from the mixture (which will by now be devoid of most of its leaves).
  7. Using your immersion blender (or a counter top blender, food processor or hand masher), purée the mix to your preferred eating consistency. If the mixture seems too thick, add a little more water or chicken stock.
  8. Return pot to heat and add the chicken (if using), simmering for another 10 minutes, or until the chicken is heated through.
  9. If adding dairy, stir in (start with a small amounts, such as a couple teaspoons – not much is needed!). IF FREEZING THE SOUP, DO NOT ADD DAIRY. WAIT UNTIL THE DATE CHOSEN TO SERVE IT, HEAT IT WELL, THEN ADD CREAM.
  10. Serve with whichever optional toppings desired, or with good bread and a salad!

Slow-Cooker Squash and Sweet Potato Soup (Sneakin’ in Those Sweet Tubers!)

 
If you were at the Women Writers and Artists Matrix Weekend in Saratoga Springs, NY earlier this month – specifically, at Amejo’s house on Saturday night for the “Women, Wine & Cheese Reception” – then you might’ve been waiting for this post, for this recipe. It was a big hit that night, devoured even before a few latecomers arrived at Amejo’s home! Of course, I forgot to take any pictures, being busy being social and all. I decided, however, to whip a batch again last week, but not just for the camera. Bill hadn’t gotten a taste (I took every last drop off to the event with me!), and it’s such a good way for me to sneak a bit of sweet potato into his diet. Yay! for that beta-carotene and all the other nutrition it provides. And the “magic” too, which I’ll get to later. (Incidentally, if you’re new to this blog and don’t know about The Terrible Three, or the only three vegetables my hubby loathes, you might want to check out the 12/11/11 post covering our delicious experiences at internationally-famous Moosewood restaurant in Ithaca, NY.)

Marilyn at WWAM Weekend, with an International Women’s Writing Guild (IWWG) SisterWriter.

The chicken stock mentioned in my previous post turned out to be the best I’ve ever conjured up. Which might not seem like much to say, since I think I’ve only made it from scratch once, perhaps a year or two ago for a batch of chicken soup – except that this version made a huge difference in not only this soup but also in the couple applications I managed to dream up for it since. So I’m sold on going homemade as much as possible, especially for soup. In fact, there’s a pot of stock simmering on the cooktop upstairs now, its intoxicating aroma wafting its way downstairs as I type. I expect to split this batch between the freezer and cooking up a pot of White Bean Soup (with Chicken) for the WomanWords workshop this weekend with Alice Orr at Still Point.

Our recent hot weather is supposed to break, and the mid-60s temp expected for Saturday is just fine for soup. Stock done today; soup-making sometime tomorrow, in between packing to leave early for Still Point on Friday (picking up Alice at Saratoga train station before settling in at SP!). Oh yeah, I’m also going to Leslie’s this afternoon to do art and then on to grocery-shop for the weekend. Yikes! What a schedule… but I do intend to finish and post this blog before all this is accomplished.
+++++

Before providing the recipe, how about a little of the food’s magic? This blog is dubbed, after all, Kitchen Cauldron. and I do like to bring it (the magic) into some posts, exploring ancient beliefs about a food along with some nutritional facts. If a witch is one who practices alchemy, who transforms one simple item into another of greater value (think: lead into gold as the metaphor goes, or more to the point for KC, basic food items into nutritious and delicious delights), then that must be me. Further, if a witch is one who takes experiences and thoughts and transforms them into words, why then I also qualify as one!

Squash, this soup’s main ingredient, has been around a long time so there’s plenty of lore. According to my handy Cunningham’s Encyclopedia of Wicca in the Kitchen (Llewellyn Publications, 2003), it’s been in the Americas since at least 4,000 B.C.E. It was so sacred to the Hopi that they even created one of their spiritual (Kachina) dolls topped with a head of squash and wearing squash blossom necklaces. This vegetable, in any form (butternut, zucchini, etc.), inspires spirituality. If someone maintains s/he doesn’t like squash, then serve that person zucchini bread! Cunningham says squash can “increase awareness of the non-physical reality around us,” and he also lists it among foods that are “generally used for promoting courage, protection, aggression, sex and health.” In The Kitchen Witch Companion: Simple and Sublime Culinary Magic by Patricia Telesco (Citadel Press, 2005), the author writes in the intro to a recipe titled Multi-Tasking Squash, “Squash comes in a huge variety of colors and sizes, and some of these can grow to exceed 240 pounds and produce hundreds of seeds. These characteristics provide this vegetable with the symbolic value of slow, steady development that leads to substantial rewards.” Hmmm. Got a big project you’re working on? Maybe this is just the soup to enhance your ability to ace it!

I think I’ve gotten into pumpkin and sweet potato symbolism before, but quickly:

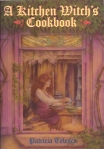
  • For sweet potatoes, those orange-hued tubers, think love and sex, the ability to excite desire (it goes both ways though – giving love, receiving love). In fact, Patricia Telesco’s A Kitchen Witch’s Cookbook, (Llewellyn Publications, 1994), lists as the sweet potato’s “Magical Association” the following: “Well founded, gentle love.”
  • For pumpkin (more orange!), think healing and money symbols – the fruitfulness of the earth inspires this; and pumpkins have been known to symbolize Mother Goddess. (To enhance its ability to attract money, it’s said that one should serve it with cinnamon, ginger and nutmeg – no wonder pumpkin pie is so popular!)

Then there are the potatoes in the soup. Earth element, since they come from it, they’re known for protective qualities and for promoting compassion (now, don’t they sound like Mother Earth sorts of attributes?). The Spaniards brought the first potatoes to Europe in 1534, where they claimed the veggie could cure impotency. This led to the value of spuds jumping outrageously high – in some cases, sales amounted to the equivalent of $1,000 in today’s U.S. dollars! Of course, this did lead to a problem when potatoes were declared “unholy” in some parts of the world (I believe Scotland was the first) and their consumption was banned. Cunningham suggests that one might make the potato’s effects stronger by adding onions, chives, dill weed, rosemary and/or parsley, but I’d add one bit of advice: Don’t throw out your Viagra either.

Garlic cloves also possess protection and health qualities. In fact, in ancient times, garlic was touted as a cure for insanity. And Roman soldiers consumed it believing that it afforded them courage on the battlefield. There’s one stipulation here, however, with garlic: don’t bother with anything like bottled, canned or dried. Allegedly, it’s only the fresh stuff that works.

It seems all the ingredients in the chicken broth are aimed at good health and well-being (Jewish mothers knew what they were talking about!), especially the chicken that played a major part in producing it. As for the spices added to this Squash and Sweet Potato Soup, they offer magical benefits too: black pepper promotes cleansing, purification, protection and banishing; salt also symbolizes cleansing and purification, with grounding thrown in; bay leaf enhances psychic powers, strength and health; sage adds possibilities for purification and wisdom; and parsley brings good for luck and protection from accidents. (In addition to other sources previously mentioned, I consulted Cait Johnson’s Witch in the Kitchen: Magical Cooking for All Seasons [Destiny Books, 2001] on the spices.)

I can’t forget to mention a few utensils you might be utilizing as you produce your soup, for the tools of the trade are not to be overlooked as part of the magic. Telesco provides a “Magical Association” for several of these. For instance, she lists a blender as being associated with “Mingling with others, stirring up energy.” Not a bad association, and plenty valid if you’re going to share your soup with others. I also assume this  works for a food processor and an immersion blender as well (and even a hand masher). She lists “Knife” as magically connected with “Cutting away, sharpness of mind, separation.” A fork might symbolize “Piercing, penetrating, perception.” I found nothing about slow-cookers, by the way, but I tend to think they’re about patience and the wisdom of taking care of oneself (as the cook, I think of an occasional slow-cooker meal as a rest period for me, at least once everything’s prepped and in the pot, then left to cook for hours during which I might write, read and otherwise own my own time!).

Cunningham says cups and bowls are related to the element of water and are therefore “entirely receptive.” They possess loving energies. He tells us that earlier cultures connected rounded pots and bowls with the Great Mother – a concept that was pretty much universal. Goddess energy. Rounded pots and bowls, like the earth. The association of witches with an iron pot, the cauldron used throughout Europe for cooking, derives from Shakespeare’s “three witches” scene in Macbeth. The old Bard’s witches weren’t doing anything at all unusual in using a cauldron for “brewing” – what was weird was what the women were cooking up (including their ingredients)! Today’s Wiccans, Cunningham states, honor the cauldron as a symbol of the Mother Goddess.

That’s more than enough magic for one post, except that I must state my best take on all of this. Yes, it’s a bit of kitchen alchemy – as I defined it earlier. And there’s lots of magic in food, in the ways it can nourish us, give us strength, make us happy, bring people together and much more. There’s magic in food like there’s magic in everything, and intention is its best enhancer. Having just read the newly revised (to add artwork) Food Rules: An Eater’s Manual by Michael Pollan, illustrated by Maira Kalman (Penguin Press, 2011), it feels right to believe that setting some of the simple intentions that Pollan suggests also sets the stage for Magic to happen (like, “#2, Don’t Eat Anything Your Grandmother Wouldn’t Recognize as Food, or #19, Eat Only Foods That Have Been Cooked by Humans, or #64, Try to Spend as Much Time Enjoying the Meal as It Took to Prepare It, or #74,Don’t Get Your Fuel from the Same Place Your Car Does. Following through on even a few of them might make you a Witch – whether you think so or not!

And now for my latest Witch’s Brew~~

SLOW-COOKER SQUASH AND SWEET POTATO SOUP
Yields enough for a small crowd (10 to 20, if they keep it to cups instead of bowls!)

Ingredients

  • 1 large onion, peeled & chopped
  • 1 large garlic clove (or 2 small), peeled & diced
  • 2 medium-sized sweet potatoes, peeled and cubed (about ¾” cubes)
  • 2 tablespoons olive or canola oil
  • 1 tablespoon butter
  • 1 medium-sized butternut squash, peeled, seeded & cubed
  • 1 14-to-16-ounce can of pumpkin puree (however it’s packaged, but NOT pumpkin pie mix); if you’re into using fresh pumpkin, go for it (I haven’t gone there yet…)
  • 2 medium potatoes (or equivalent in leftover mashed potatoes)
  • 2 large bay leaves (or 3 small)
  • 2 teaspoons dried thyme
  • 1 tablespoon dried parsley
  • 1 to 2 teaspoons sage
  • 4 cups chicken stock (homemade preferred, but if not available then use a low or no sodium brand)
  • salt & pepper to your personal taste (but at least a teaspoon of salt and ½ teaspoon of pepper!)
  • options for serving: light cream (to stir in); Greek yogurt, sour cream, parsley and/or croutons (for toppings)

Process

  1. In a large frying pan, sauté the onion and sweet potato for about two to three minutes.
  2. Add the garlic and continue to sauté for another minute or two. Watch carefully, stir as necessary, being sure that the garlic doesn’t burn (if it burns, you’ll have to start over… no “fix” for burned garlic taste!).
  3. Remove frying pan from heat and set aside.
  4. Add the butternut squash and potatoes to the bottom of the slow-cooker.
  5. Spread pumpkin puree over squash and potatoes.
  6. Top contents of slow-cooker with the sautéed contents of the frying pan.
  7. Sprinkle the bay leaf and dried herbs (thyme, parsley & sage) over everything, as well as salt and pepper (you can season further with s&p, if needed, although it’s best to wait until after the soup has cooked fully).
  8. Pour the four cups of chicken broth over the contents of the slow-cooker.
  9. Cover and cook on low for 4 hours. Test at 3½ hours for doneness (potatoes and butternut squash must be well done, enough for a fork to easily pierce). Stir and replace top to cook for added time, if necessary.
  10. When contents are done, removed bay leaves.
  11. Using an immersions blender (or food processor, stand blender or by hand with a masher), puree the mixture to the texture you enjoy most (I like it thick and chunky!).
  12. If it’s thicker than you prefer, feel free to add either more chicken stock or water, a little at a time, stirring in between. (If you plan to add light cream before serving, allow for that extra liquid – although you probably won’t stir in more than ¼ to ½ cup of the dairy if you truly want to savor the vegetables!)
  13. Freeze or serve with options listed above (light cream, to stir in; Greek yogurt, sour cream, parsley and/or croutons, for toppings).


How to Get Rave Reviews: Start with Homemade (Chicken, or other) Stock

I started this blogpost last night, first drafting the recipe and then deciding the lead-in (narrative) part would have to wait until today. Since I was scheduled to attend a workshop at East Line Books in Clifton Park, NY this morning on Food and Travel Writing, led by Alison Stein Wellner, I knew it would be later in the day that I’d get back to it. I am now glad it happened that way. As I’d hoped, the info-packed session “pumped me up” again for writing. Not only the foodblog, but for other food-related literature as well. And maybe, just maybe, I might find myself returning to a get-published (as in other-than-self-published) frame of mind.

It’s been a long time since potential acceptance by magazines and journals held any allure for me. I simply want to write. And cook. And do art. And spend time with family and good friends. Alison, however, through one of her short writing exercises, managed to tease out of me an idea for a series of articles that I not only want to write but feel compelled to share with anyone who’ll listen/read. Seeking publication in a relevant magazine might be the best way to do that.

One simple question from Alison, “What fascinates you about food and travel?” – with ensuing suggestions about possible directions our pens might take us in from there – set everyone in the room scribbling. Her best advice: “Write about what fascinates you,” because to do otherwise means you’ll begin to hate it. It will become as much drudgery as any of the worst 9-to-5 jobs you’ve ever held.

This “new” topic fascinates me. Unfortunately, I can’t share it with blog readers right now. It requires nurturing, planning and lots of time (and work) to come to fruition. (If I had time, I’d be signed up for Alison’s workshop at the Capital Region Arts Center next weekend, June 2nd. She’ll be covering The Business of Freelance Writing!)

In the meantime, now that I’ve worked up your curiosity, how about a return to Chicken Stock?
++++++++++

If you’ve been reading this blog for a few months, you’ve probably noticed that I mention the use of boxed stocks in cooking up batches of my soups (and I do love making soup!). I’ve discovered a couple brands that I like. They’re not high in sodium (some sodium-free), plus they’re pretty tasty. So I wasn’t necessarily gung-ho for stirring up a pot o’ the homemade stuff. But reading a relatively new, food-related book changed my mind.

Here’s what I wrote about An Everlasting Meal in my “journal” of books I’ve read (yes, I have a list of every book I’ve read, i.e., completely finished, since 1995; had to do it since I found I couldn’t remember which I’d read and sometimes would begin to read something, only to realize I’d read it a year or two before!):

Adler, Tamar. AN EVERLASTING MEAL: COOKING WITH ECONOMY AND GRACE. Scribner, 2011. Essays on food. Beginning with “How to Boil Water,” Adler caught me up in her beautiful prose. Which often reads like poetry. How about the title of the next chapter, “How to Teach an Egg to Fly”? In which she says to the reader, “A gently but sincerely cooked egg tells us all we need to know about divinity. It hinges not on the question of how the egg began, but how the egg will end. A good egg, cooked deliberately, gives us a glimpse of the greater forces at play.” There are recipes too but not always in a real recipe format. She wants her readers to learn what to do with foods without need of a cookbook. She wants us to love food; not waste it; share it with others because it’s about nourishment and, thus, relationships. A truly wonderful book. Highly recommended, whether you like to cook or not.

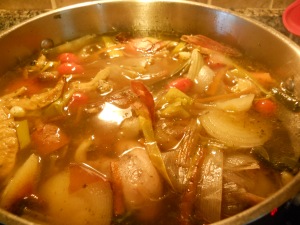
A small part of Adler’s desire not to waste the gifts of the earth includes saving the ends, peels and odd chunks of aromatics, as well as bones of fish and fowl and animals, for stocks that add gusto to future meals. I now freeze many of these bits of leftovers and otherwise not usable veggies (except maybe in compost), later to stew up the most delicious stock! Below is the chicken one (to be followed by a future post, with pictures, for a soup that was a mega-hit at the Women Writers and Artists Matrix Weekend in Saratoga earlier this month), but it’s not the only stock I’ve created since reading this exquisite book.

After serving a seldom-seen dinner on our table (lamb), I managed to find time to toss the bones, aromatics and water into a pot, then strain and freeze the results. Last week, I made one of my hubby’s favorite meals, Braised Stew Beef (it makes its own gravy) over noodles. Instead of cooking it down with water added to the extra-large frying pan, I poured in one of the thawed containers of lamb stock. Rave reviews ensued.

You too could get rave reviews. Not from the New York Times food critic, but from someone whose opinion matters more to you. Start with homemade stock.

MARILYN’S HOMEMADE CHICKEN STOCK
Yields one really, really large stockpot full of delicious liquid!

Prelude to Ingredients: Collect & freeze, over a few weeks or a month, the following –

  • Chicken bones, with any amount of meat still stuck to them (or none at all)
  • Ends cut away from onions, shallots, leeks, carrots, celery, garlic (and maybe more, depending upon your own taste and judgment)
  • Onion, carrot, celery and garlic peelings, pieces and leaves

Ingredients:

  • 1 tablespoon olive or canola oil, with a dab of butter added
  • 2 carrots, unpeeled, cut into 2 or 3 pieces
  • 2 small celery stalks, unpeeled, cut into 2 or 3 pieces
  • 1 to 2 onions, peeled and quartered
  • 3 garlic cloves, cut in half
  • all of “Prelude” ingredients listed above – minimum of a 1 gallon zip-lock bag of the veggies; plus at least bones equivalent to 2 chickens, whether chicken parts or whole birds (it’s good to include some bones with bits of dark meat on them, for good flavor)
  • a few grape (or cherry) tomatoes (but only if you have them and wish to include them), halved
  • water to cover all ingredients, and then some… (filtered water is better than tap water, especially if you’re on public water that’s chemically treated – but it’s not required)
  • 1 teaspoon peppercorns
  • 1 to 2 teaspoons sea salt (or kosher, if preferred; but you can use table salt, just not the whole 2 teaspoons in the latter case)
  • 3 or 4 small sprigs of dried thyme
  • 2 small sprigs of dried rosemary
  • 1 to 2 tablespoons of dried parsley
  • ½ teaspoon lemon zest (optional, but a nice touch)

Process:

  1. Sauté the carrots, celery and onion in the oil/butter for about 2 minutes – in a large stockpot. (I lightly salt these at this time too.)
  2. Add garlic to pan; continue to sauté for about a minute more (do not burn the garlic or you’ll have to start over!).
  3. Add the rest of the vegetable items (peels, ends, etc.), along with the grape (or cherry) tomatoes, if using, and the batch of chicken bones. Cover with water – enough to bring it to at least three inches over the ingredients.
  4. Toss in peppercorns, salt, thyme, rosemary, parsley and lemon zest (if using).
  5. Bring to a boil, then reduce to a simmer.
  6. Allow to simmer for a minimum of 2 to 3 hours. You’ll want water to reduce gradually as flavor intensifies.
  7. When the stock meets your own taste-bud test, turn off the heat and let sit for a bit.
  8. After about 20 minutes, strain through a sieve and distribute stock amongst containers in which to freeze – perhaps retaining some to make soup immediately, or use for braising a chicken or other dish.
  9. When cool enough (it’s wise to sit containers in ice bath to get it there- much safer, foodwise), place in freezer for future use. Make sure you’ve marked containers (with labels) with info about what’s in it and date it was frozen!

Sorry – didn’t think to take a picture of the strained stock. Besides, I’m sure all my readers have an idea of what that looks like! Stay tuned, however, for the next post – in which this stock helps to transform butternut squash, pumpkin puree and sweet potato into a thick, savory soup that you’ll want to inhale (it’s that good).

EVERYBODY’S FAVORITE: RICH VANILLA CUPCAKES

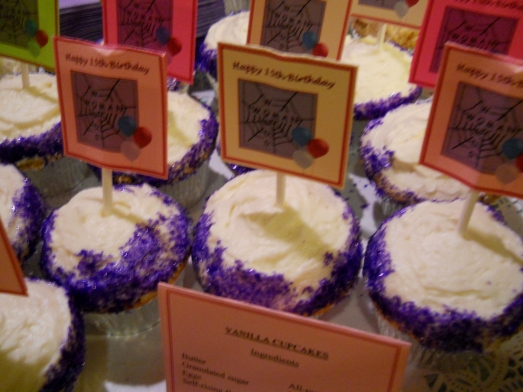
Here’s the last cupcake recipe from the WomanWords 15 Year Birthday Reading. It’s taken a while to get everything related to that event posted (busy with so many other things, including my blog related to connections to the International Women’s Writing Guild and those SisterWriters. While one of my favorite truisms is, “So Many Books, So Little Time,” I could just edit that to say, “So Many Creative Possibilities, So Little Time!”

This recipe was derived from the “Traditional Vanilla Birthday Cake” in The Magnolia Bakery Cookbook: Old-Fashioned Recipes from New York’s Sweetest Bakery by Jennifer Appel and Allysa Torey (Simon & Schuster, 1999). It’s the same one I used to concoct the Gluten-Free Almond Cupcakes also offered at the Caffé reading.

Not surprisingly, these were the most popular of cupcakes that night. I guess everyone loves an old standard! (And by the way, have I ever mentioned that vanilla is considered to be a powerful love stimulant? Only the real stuff works, however, according to what I’ve read – but then nothing artificial is ever quite as good. American women, at one time, even dabbed it behind their ears to attract men! In this case, of course, we were stimulating a love of words… but then, who knows what was going on out in that audience?)

Without further ado, the recipe…

VANILLA CUPCAKES
Yields 24 cupcakes (or, as the Magnolia Bakery recipe suggests, 1 three-layer cake)

THE CAKES

Ingredients

  • 1 cup (2 sticks) unsalted butter, softened
  • 2 cups granulated sugar (I’m now mostly buying “evaporated cane juice” organic sugar – BJ’s has started to carry it!)
  • 4 large eggs, at room temperature
  • 1½ cups self-rising flour
  • 1¼ cups all-purpose flour
  • 1 cup milk (since I only stock 2%, I subbed a bit of heavy cream for some of the milk)
  • 1 teaspoon bakery emulsion (or you can use vanilla extract, as the original recipe lists)

Process

  1. Pre-heat oven to 350 degrees Fahrenheit.
  2. Place 24 paper cupcake fillers in cupcake tins, or grease and lightly flour each cakespace.
  3. In a large bowl, using an electric mixer at medium speed, cream the butter until smooth.
  4. Add sugar to butter gradually, then beat until fluffy (about 3 minutes).
  5. One at a time, add eggs. Beat well after each addition.
  6. Combine the flours in another bowl using a whisk.
  7. Add flour mixture in four parts, alternating with the milk and bakery emulsion (or extract if using that), beating well after each addition.
  8. Divide batter between the prepared cupcake tin spaces.
  9. Bake for 20 to 25 minutes or until a cake tester or toothpick inserted into a couple of the little cakes comes out clean.
  10. Remove tins to wire racks and allow to cool for about 10 minutes.
  11. Remove cakes from pans to wire racks to cool completely before frosting or freezing. (If freezing, individually wrap in plastic wrap as soon as cooled, eliminating all air. They should keep for at least up to two weeks or even a month. I had never frozen cupcakes before but, via the internet, learned that one should take the wrapping off before thawing – as soon as taken out of the freezer – or they will have a gluey top texture. Then frost. That worked out great!)

THE FROSTING

Ingredients

  • 1 cup (2 sticks) unsalted butter, very soft (if you run out of unsalted butter, salted is OK to use)
  • 3½ cups confectioners’ sugar (have extra available in case you need more)
  • ¼ cup milk (I used 2% milk but whole or 1% works just as well; can always add more if too stiff)
  • 1 tsp. vanilla powder (or vanilla extract, if preferred)
  • Food coloring, if desired
  • Decorative sprinkles or colored sugar, if desired

Process

  1. Place butter in large mixing bowl.
  2. Add 2 cups confectioners’ sugar, milk, and vanilla powder (or extract).
  3. Beat until smooth and creamy.
  4. Add remaining sugar, gradually, until icing is a good spreading consistency.
  5. Mix in food coloring, if using.
  6. Decorate cupcakes with icing (also with sprinkles or decorating sugar, if using).
  7. Frosting keeps best if eaten within 3 days (which works out well, since cupcakes also keep best for first 3 days).

WHAT TO DO WITH YOUR LEFTOVER MUFFINS & CUPCAKES

Got a couple muffins or cupcakes that are just a bit past their prime? Not likely anyone will opt to devour them in this condition? Here’s a terrific idea, gleaned from The Art of Eating In: How I Learned to Stop Spending and Love the Stove by Cathy Erway (Gotham Books, 2010).

Erway’s book, inspired by her blog, tracks her journey through what she’d determined would be a year of NOT eating in restaurants in New York City – which, when done as often as most New Yorkers do, is expensive as well as not necessarily good for either the body or the environment. It’s an engrossing book that not only chronicles her cooking and baking endeavors (with recipes) but also her adventures while exploring underground supper clubs, local cook-offs and even a few experiences with “trash diving, freegans and frualistas.” Her recipe for “Almond Custard Tarts with Leftover Muffin Crust” inspired the recipe below, hurriedly drafted as I am in the middle of packing to attend the Women Writers and Artists Matrix (WWAM) Weekend in Saratoga Springs this weekend. I wanted to get another post onto KitchenCauldron before I take off!

These are incredibly easy to make. And it was the perfect use for the leftover gluten-free almond cupcakes I’d made for the WomanWords Reading at Caffè Lena. G-free baked goods are notoriously drier the next day (although mine were more moist than most), plus these had ground nuts in them. What more could I ask for in a tart crust? (Oh yeah, I was going to assume that readers would realize they’d not be using any frosting that was on a cupcake – but then we know why one shouldn’t ASSume, right? Such assumption would make of me what the first part of that word spells out!)

The few changes I made to Erway’s recipe are noted within the recipe. I also gave the option of simply using a “cook & serve” boxed pudding, if you’re really short on time or prefer not to do custard from scratch.

Bill loved these tarts, as did I. And they’re so simple to make, yet look so fancy-schmancy!

I know I have one more cupcake recipe to post from the WomanWords 15-Year Birthday Reading, but that will wait until next week. It’s for the most popular of the cupcakes that night too – a super-rich vanilla cupcake. And then there will be the Squash & Sweet Potato Soup that I’ll want to tell you about—there’s a potluck at the home of one of the WWAM founders tomorrow night, and I made it in the slowcooker! All I have to do is remember to bring the camera and to actually take a few snapshots of the evening’s feast!

May you all have as creative a weekend as I am expecting to enjoy!

ALMOND (OR VANILLA) CUSTARD TARTS FROM GOING-STALE MUFFINS/CUPCAKES
Yields 4 tarts

CRUST:

Ingredients

  • 1 or 2 leftover muffins or cupcakes (the “heavier” texture of muffins make them the best candidates for these tarts, but use the latter if crumbs are truly stale, especially if there are nuts in them!)
  • 1 tablespoon water (you could use melted butter instead, which I did, but not necessary)

Process

  1. Pre-heat oven to 375 degrees.
  2. In a bowl, crumble your muffin or cupcake by hand.
  3. Add the water (or butter) and combine with a spatula. Mixture should be moist but you don’t want it to stick together in a ball.
  4. Press the mixture with your hands or a spatula firmly into the sides of four ramekins.
  5. Place the ramekins on a baking tray and bake for 10 to 15 minutes.
  6. Remove to a wire rack and cool completely before filling.

CUSTARD (two options):

Option #1 Ingredients

  • ½ cup sugar
  • 2 cups whole milk (I don’t stock whole milk so I combined 1¼ cup 2% and ¾ cup heavy cream)
  • 4 egg yolks
  • 1 teaspoon almond or vanilla extract
  • ¼ teaspoon ground nutmeg
  • Fresh berries for topping (optional) – I had only frozen strawberries, which don’t look as pretty but they sure tasted good!

Option #1 Process

  1. Whisk sugar, milk, extract and nutmeg together in a saucepan.
  2. Scald the mixture by bringing it to a boil. Then turn off the heat (if you have an electric stove, make sure you remove it from the burner or hot cooktop area!)
  3. In another bowl, lightly beat the egg yolks.
  4. While stirring, add a small amount (about a teaspoonful) of the heated milk mixture (this is called tempering, which should ensure the eggs don’t begin to cook when adding hot liquid).
  5. Gradually add a few more teaspoons of milk mix. Mixture should be smooth, not lumpy.
  6. When you’ve added about ½ cup of the milk mixture, pour the egg mix into the milk one.
  7. Cook over medium heat, stirring once in a while, until the custard has thickened to where it coats the back of a spoon dipped into it.
  8. Pour custard into the baked tart shells.
  9. Sprinkle with a little more nutmeg.
  10. Chill in refrigerator until set, about 3 to 4 hours.
  11. Serve with berries atop, if using.

Option #2 Ingredients

  • 1 box “cook & serve” vanilla pudding (strongly advised not to use “instant” pudding – it’s just terrible)
  • ½ teaspoon of almond extract (if you want to add a bit of almond flavor to vanilla)
  • Up to ¼ teaspoon nutmeg
  • Berries, as noted above in Option #1

Option #2 Process

  1. Cook pudding according to directions on the box, adding extract (if using) and nutmeg.
  2. Chill for amount of time directed on box.
  3. Serve with berries atop, if using.